Learn how to create the modern Japanese sashiko pattern tulips チューリップ | Sashiko Pattern
The modern Japanese sashiko pattern tulips チューリップ means, surprisesurprise: “tulips.”
The pattern is made up of straight vertical, horizontal and diagonal lines. There are moyōzashi versions that go by the same name, but this one is categorized into hitomezashi.
Meaning of the sashiko pattern tulips
Like many modern patterns, tulips is completely free of any culture-induced meanings.
But many stitchers attribute the meaning of the flower to the pattern. In this case the pattern means “caring” or “charity.”
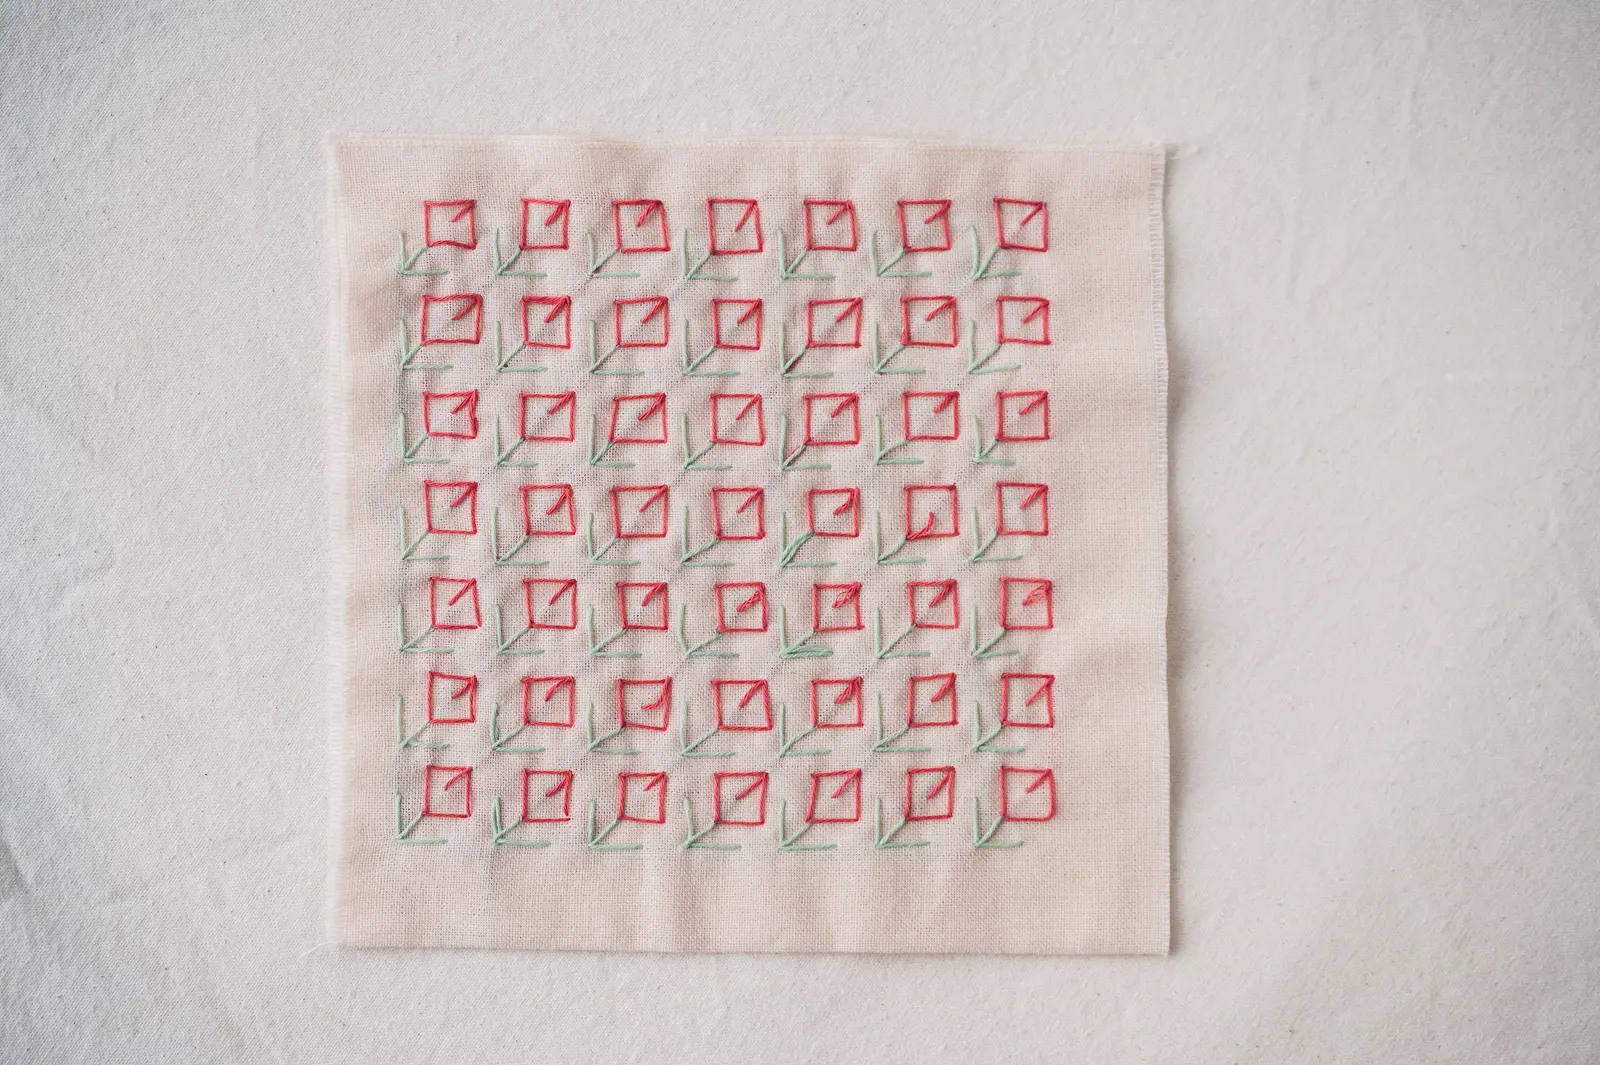
Stitching directions for the sashiko pattern tulips in 12 steps
Overview
- Step 1 – Pin the fabric in place
- Step 2 – Make the outline for your pattern
- Step 3 – Draw a grid
- Step 4 – Fill in the horizontal lines
- Step 5 – Fill in the vertical leaf lines
- Step 6 – Add a guideline for the tulip's petals
- Step 7 – Start sewing a leaf in one direction
- Step 8 – Sew the other leaf
- Step 9 – Sew the stem
- Step 10 – Sew one direction of the petals
- Step 11 – Sew the other direction of the petals
- Step 12 – Fill in the tip of the tulip
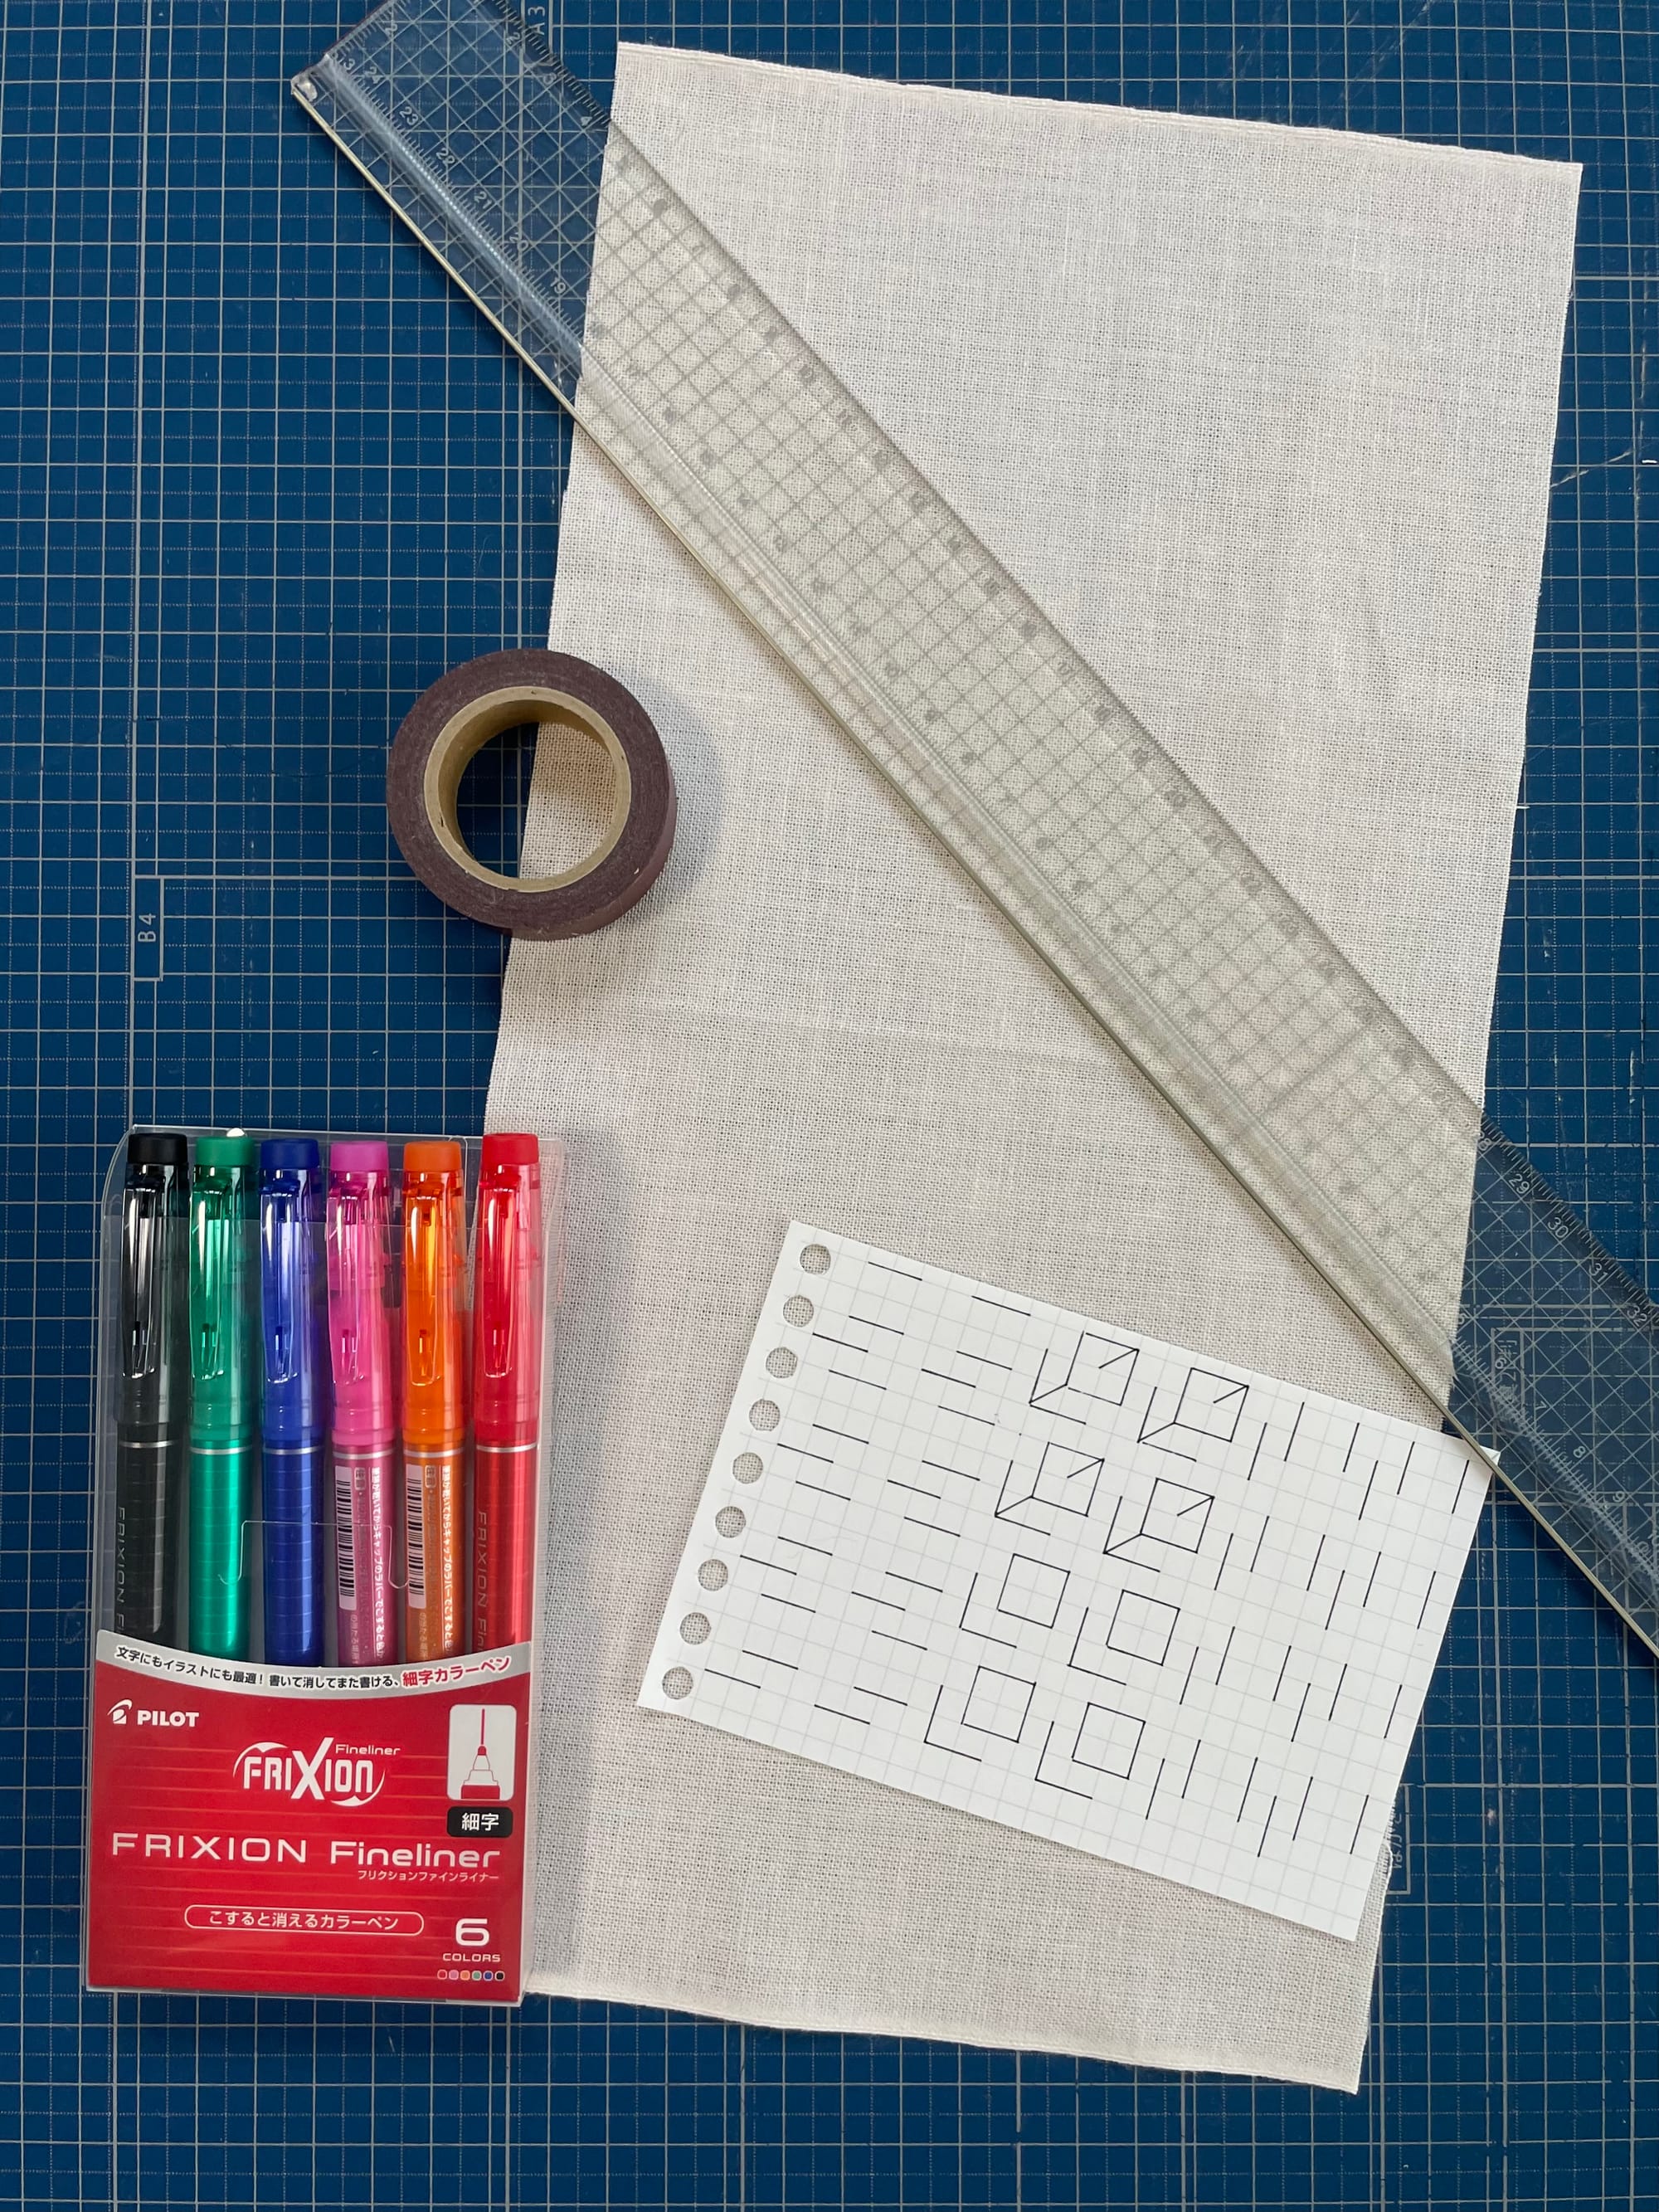
If you want to draw the tulip sashiko pattern yourself, I recommend the following supplies:
- Washitape
- a long ruler with a grid on it
- heat-erasable pens
- a piece of fabric
- a cutting mat
- the tulip sashiko pattern as a visual aid (you can download the pattern at the bottom of the page)
Feel free to check my recommended products for transferring the pattern.
Step 1 – Pin the fabric in place
Tape the fabric to your cutting mat. If you don't have any tape, you can use weights or stones to pin the fabric in place.

If you have a cutting mat, try to align the fabric to the grid, it will help you get straight lines.
Step 2 – Make the outline for your pattern
Draw the outline of your pattern, if possible use a lighter color for these lines.
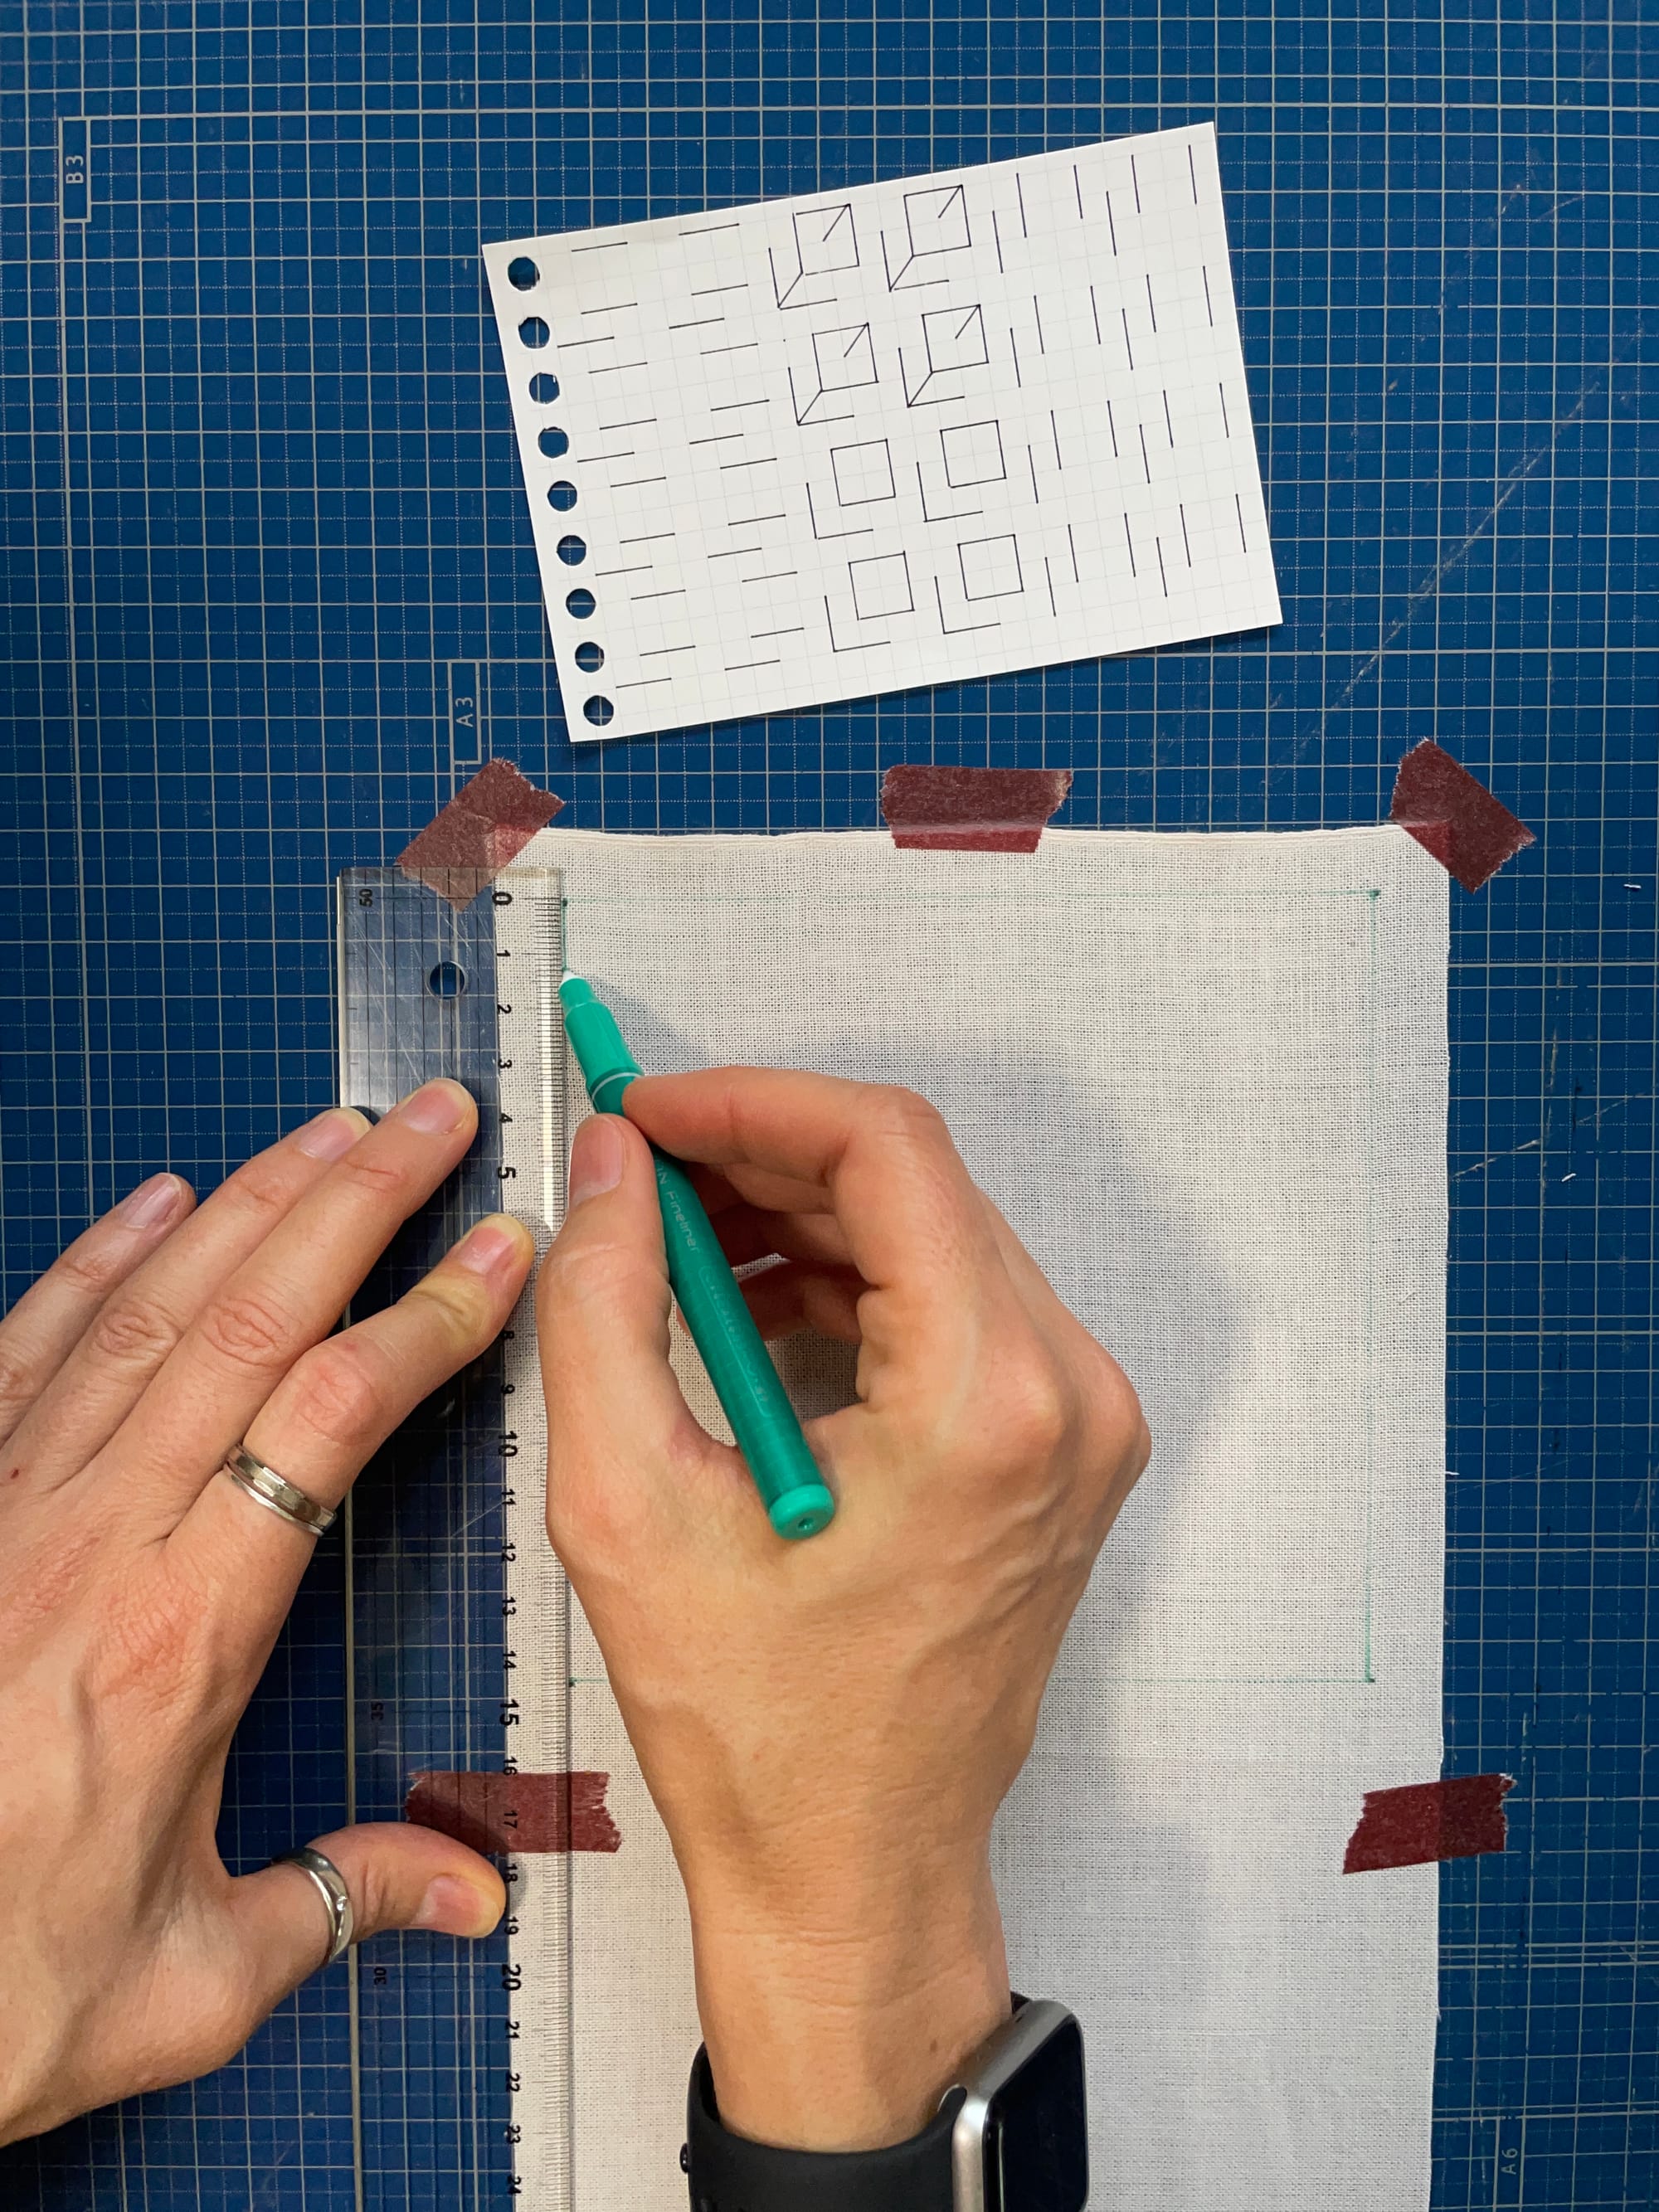
Step 3 – Draw a grid
Draw dots on your outline to help keep your lines straight.

Step 4 – Fill in the horizontal lines
Draw the horizontal lines of your pattern. It doesn't matter in which sequence, go for what's easiest for you.
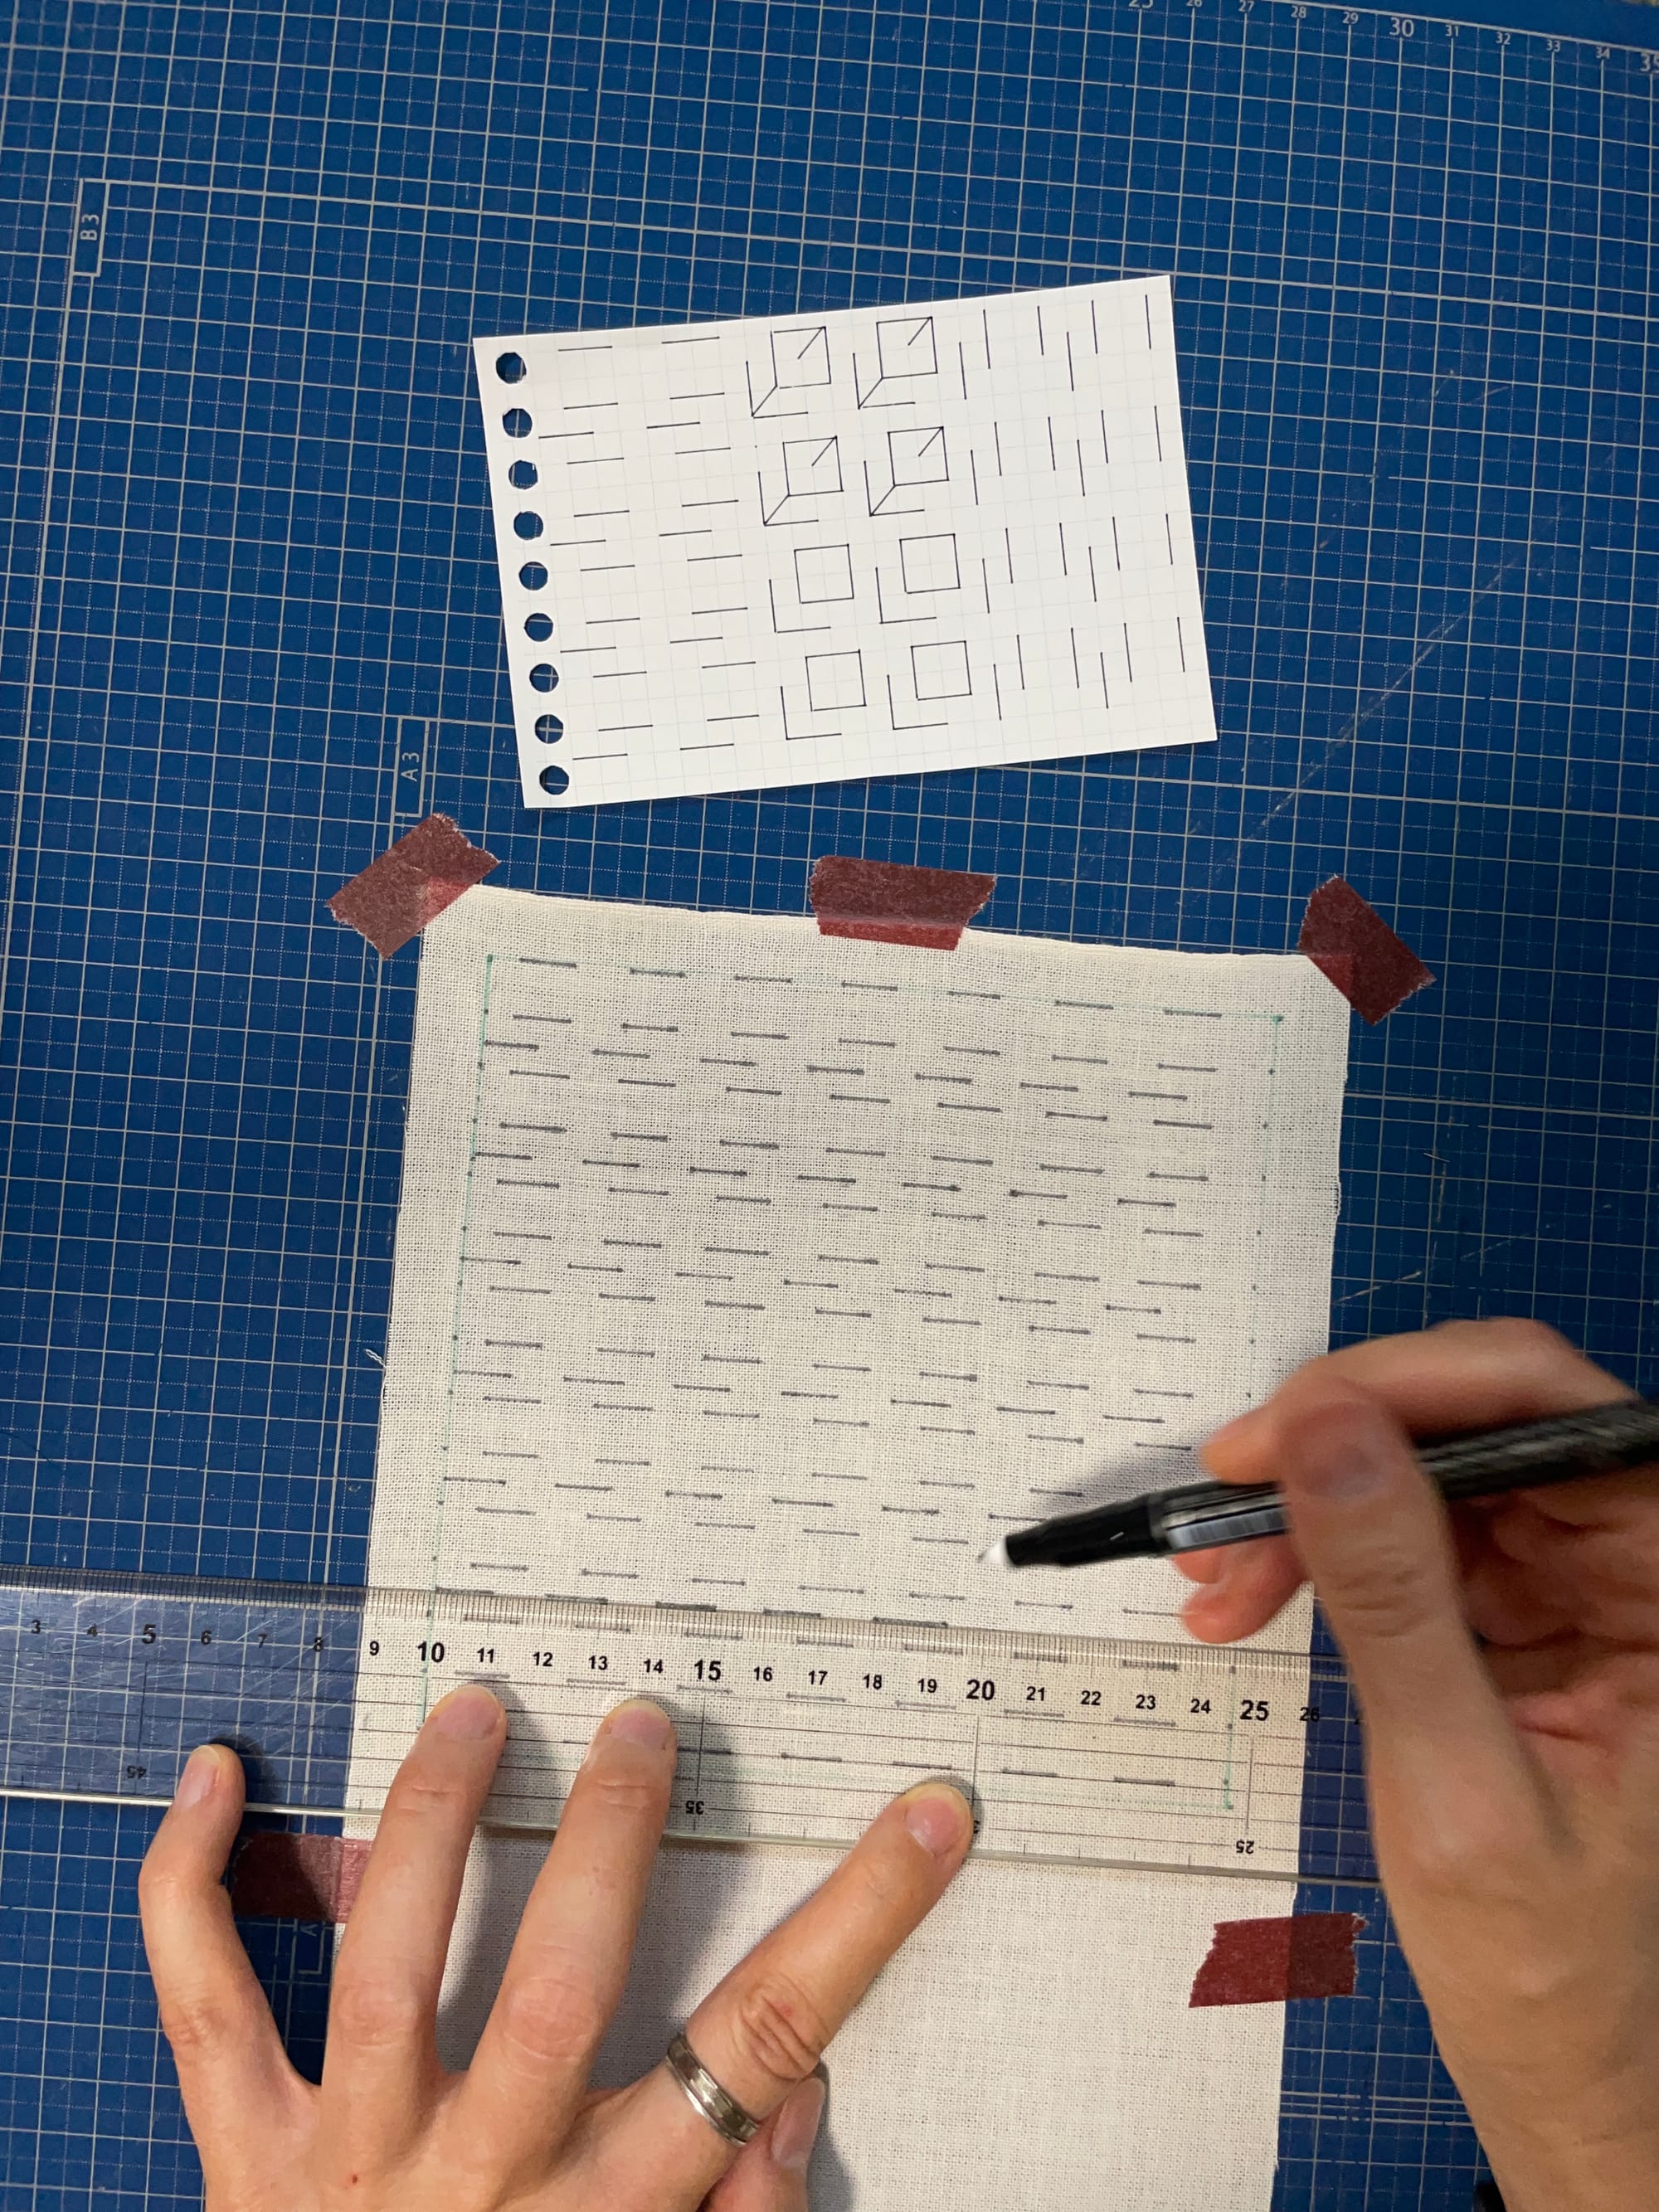
Step 5 – Fill in the vertical leaf lines
Fill in the vertical lines. It's easier if you turn your cutting mat by 90 degrees.
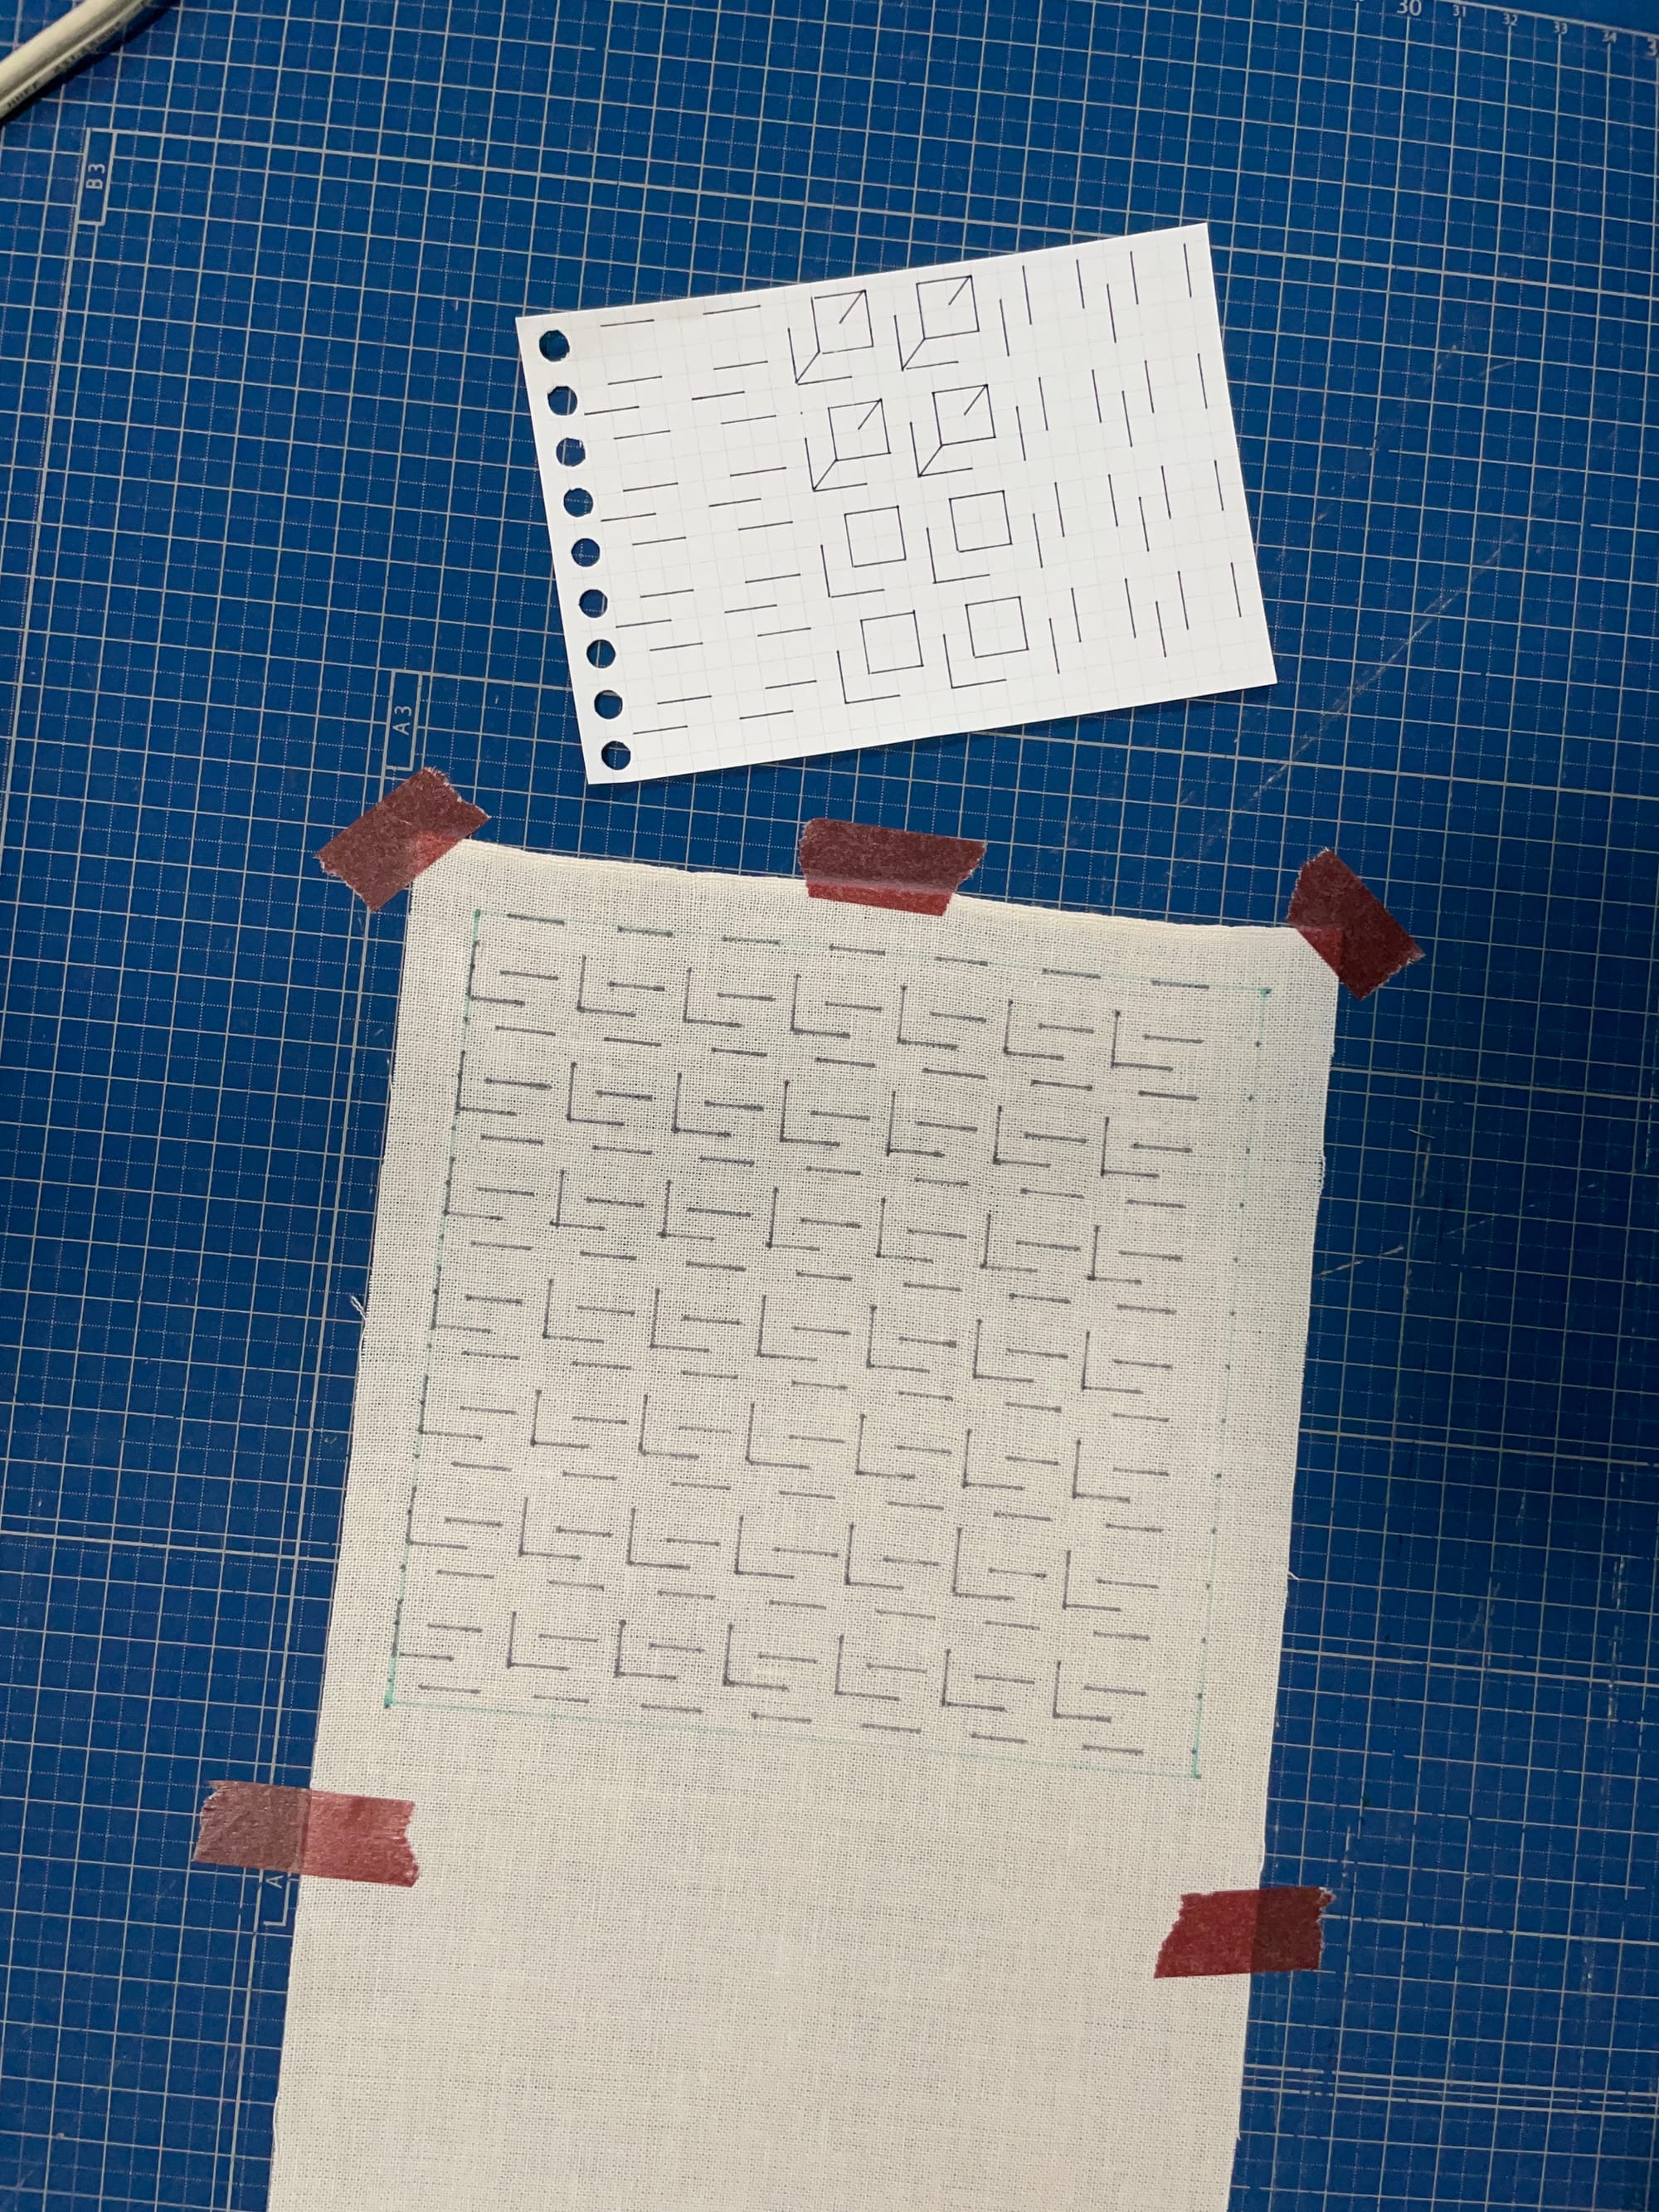
Step 6 – Add a guideline for the tulip's petals
You can fill in the remaining vertical lines, but they are not really necessary, as the vertical and horizontal lines already tell you where the stitches will go.
So instead, let's fill in diagonal lines as a guideline to where the tulip petals should start. This is way less work than drawing the stem and petal line.
To not get confused, I am using a different color.
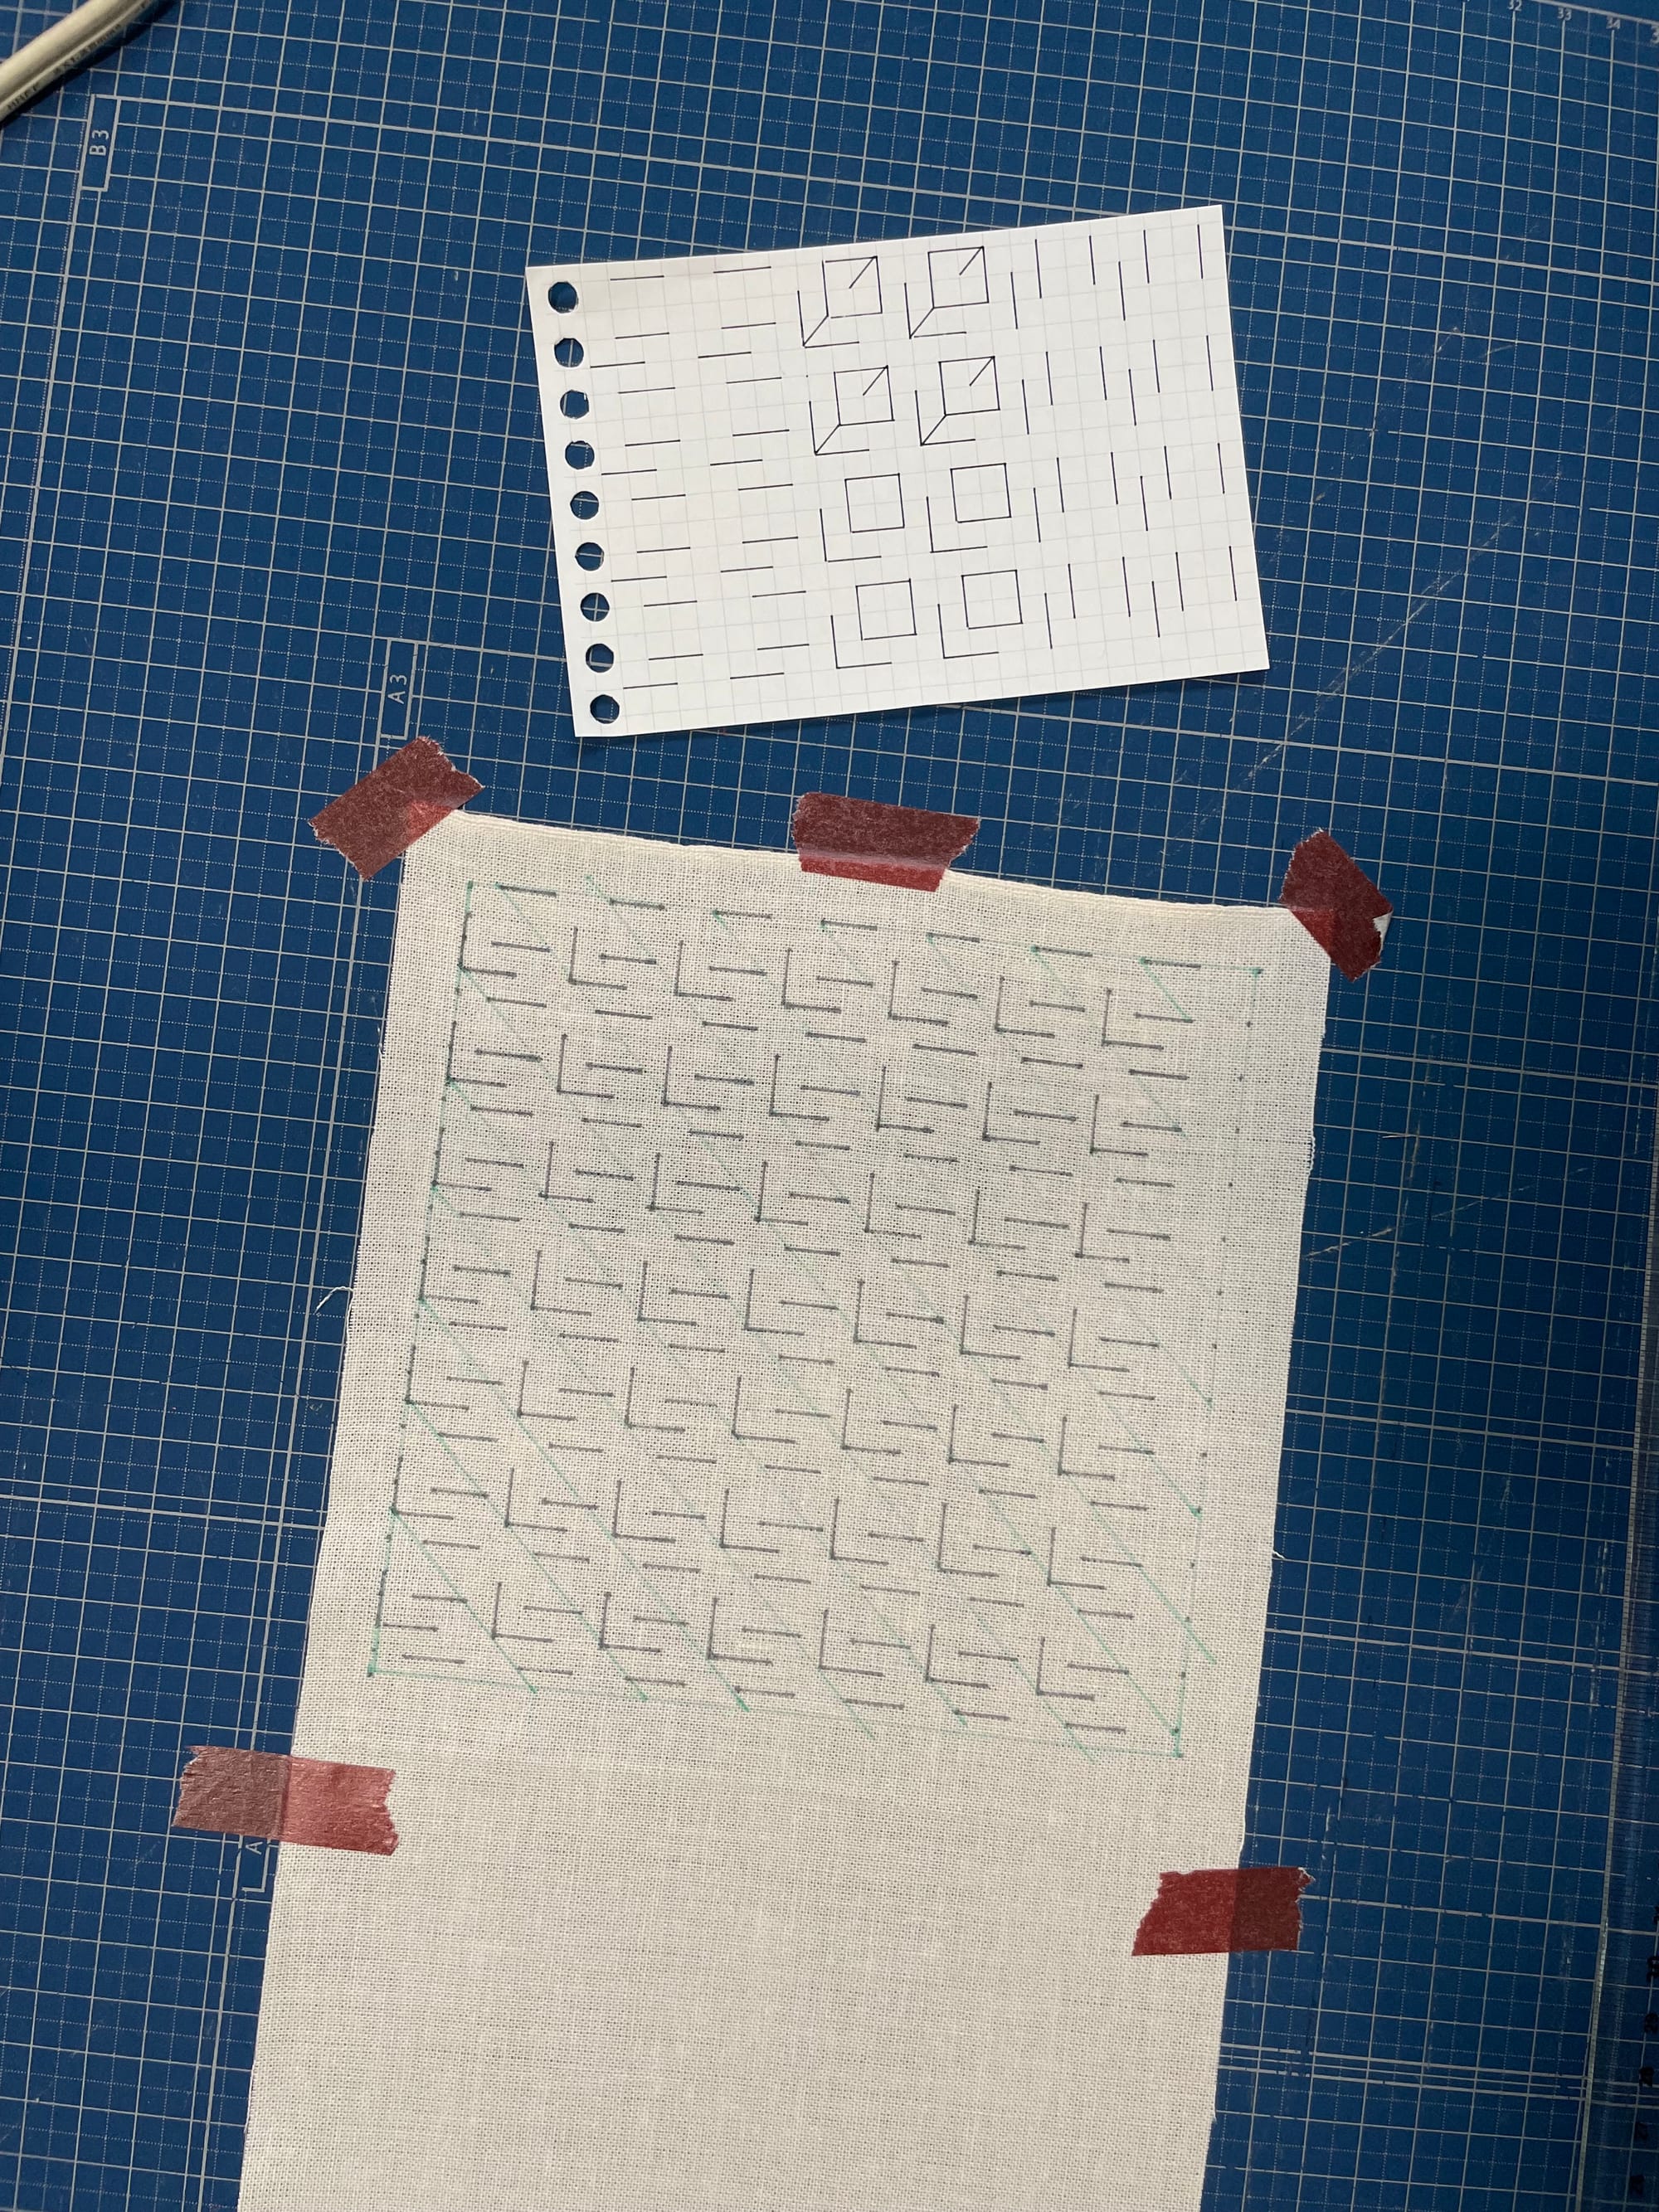
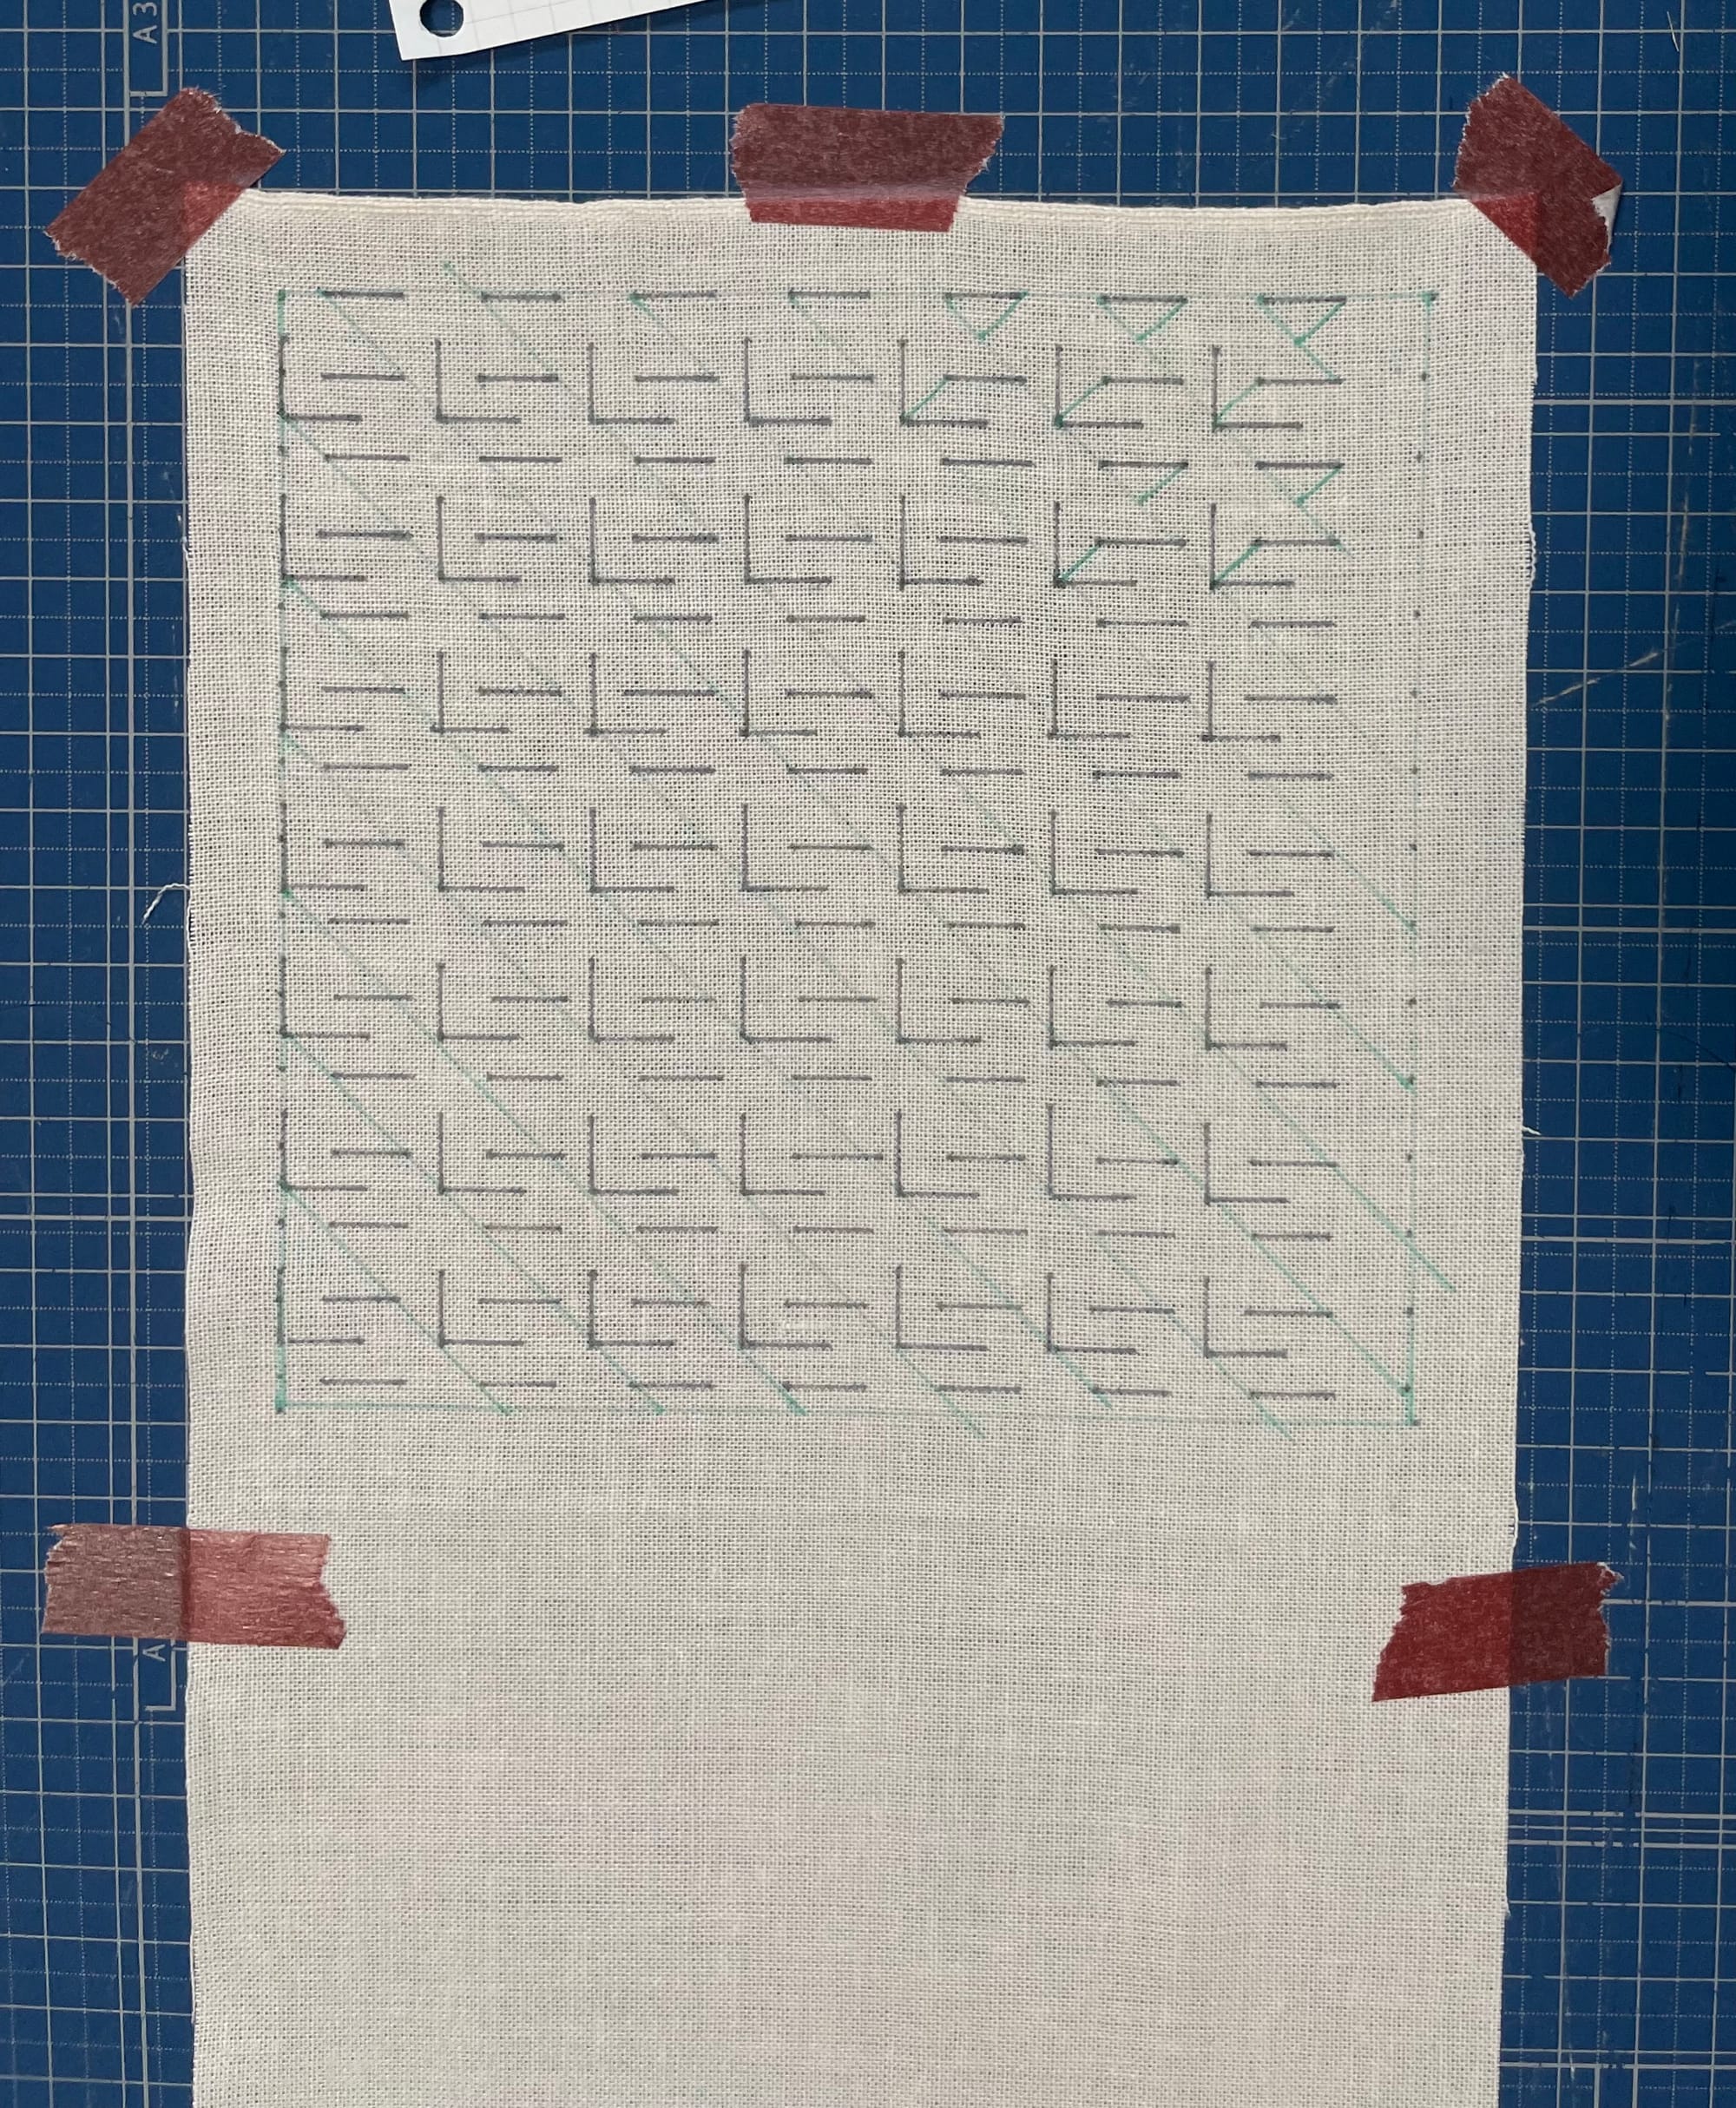
These lines tell me exactly where the tip of the tulip ends. You can see in the top right corner of the photo below where the diagonal lines of the tulip starts and ends.
If you want more support, you can fill in these lines, but if you use a palm thimble, your lines should end up being straight anyway.
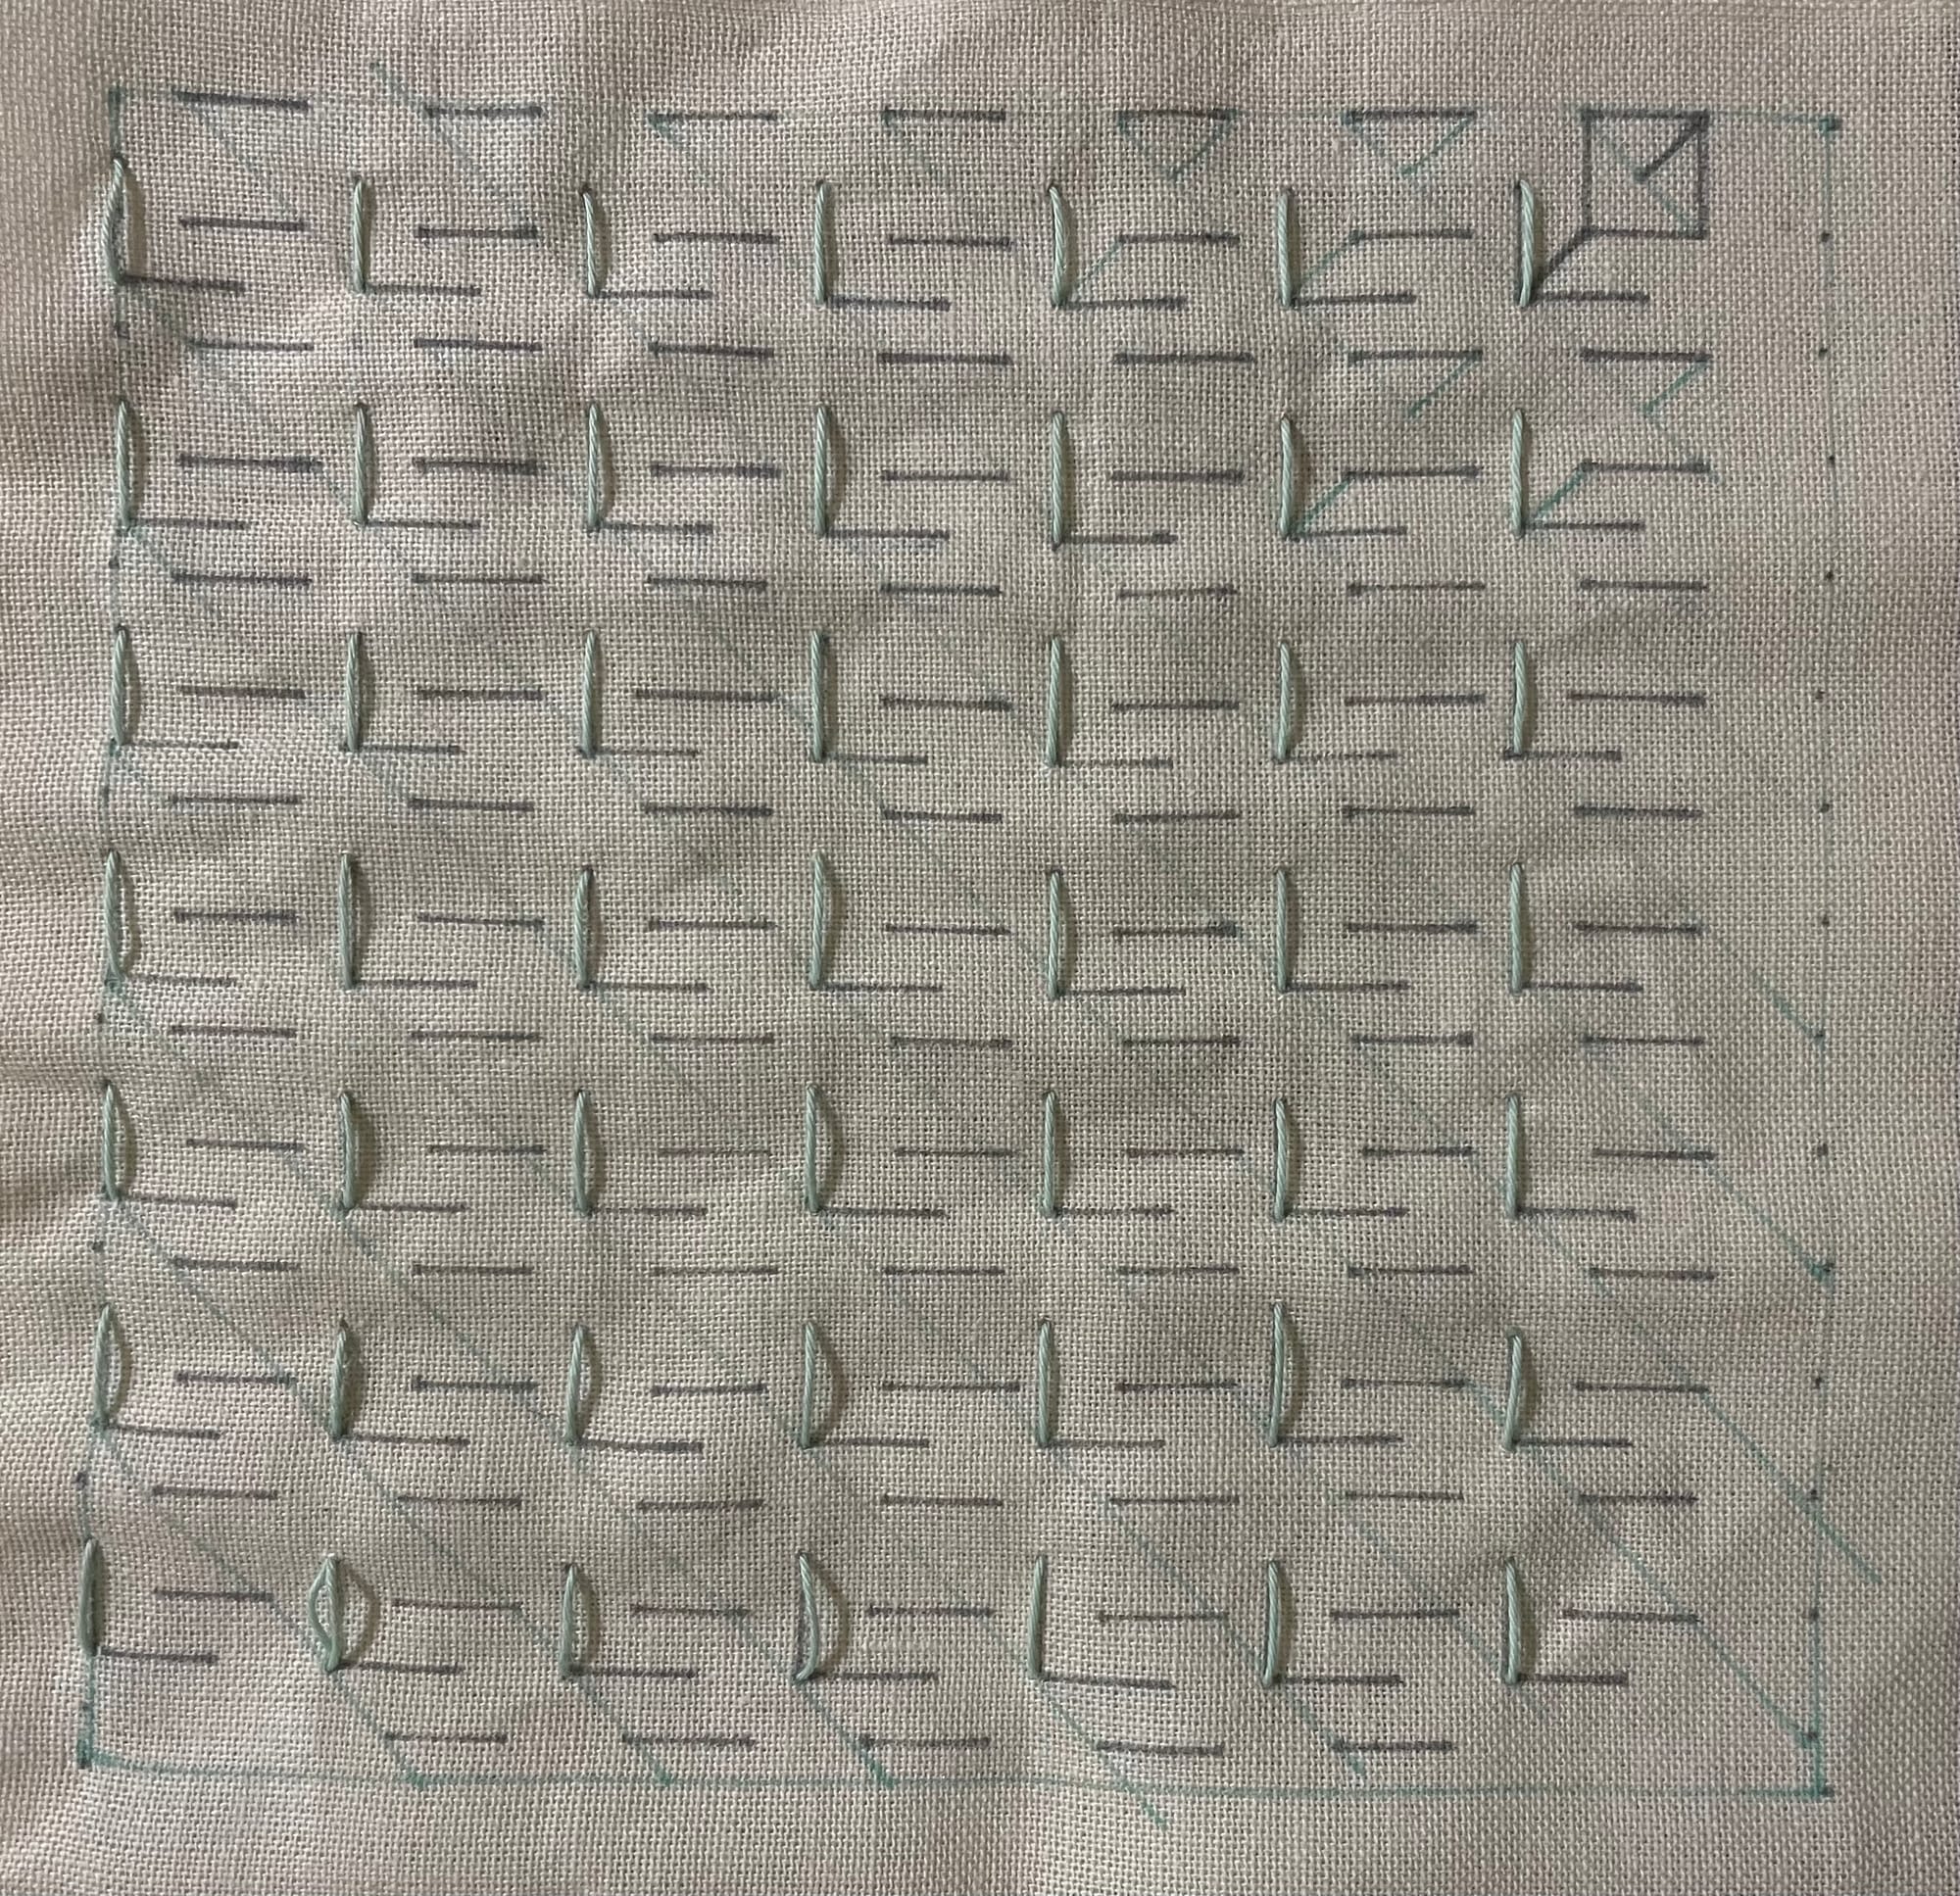
Step 7 – Start sewing a leaf in one direction
If you use different colors for the petals and the leaves and stem, start by filling in either the vertical or the horizontal lines for the leaves.
Step 8 – Sew the other leaf
Fill in the other direction next.
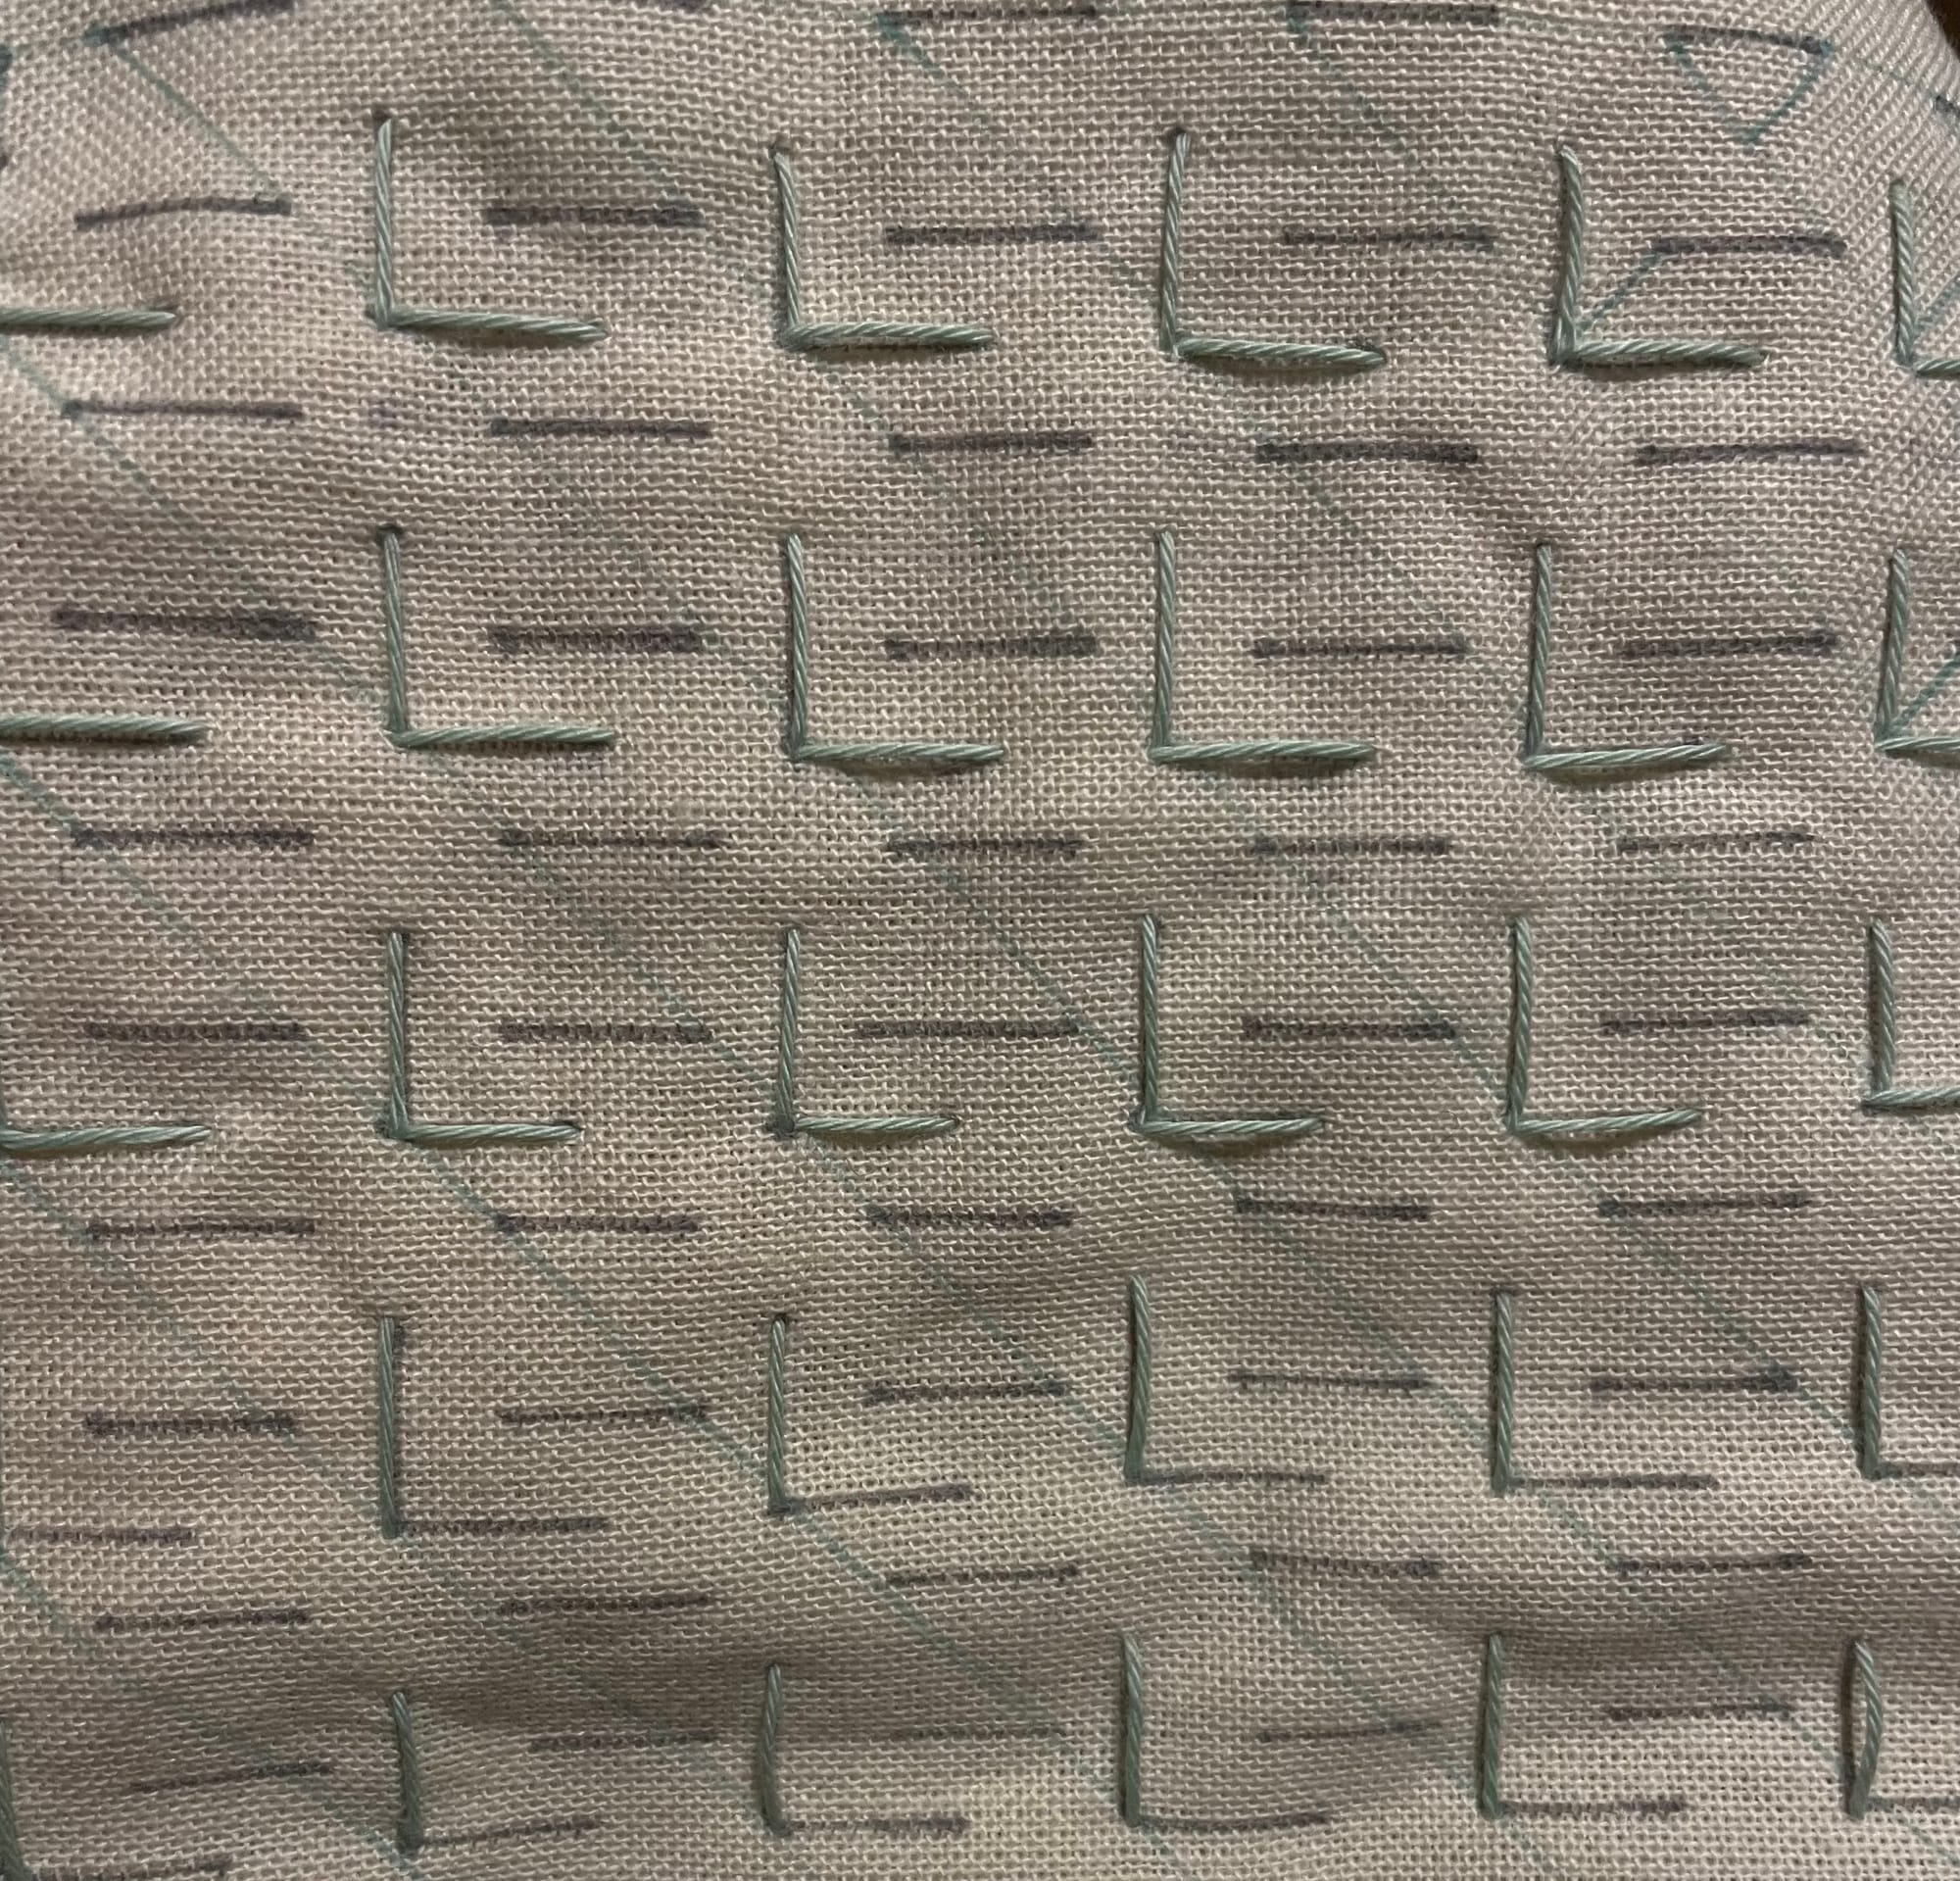
Step 9 – Sew the stem
Next, fill in the diagonal lines of the stem.
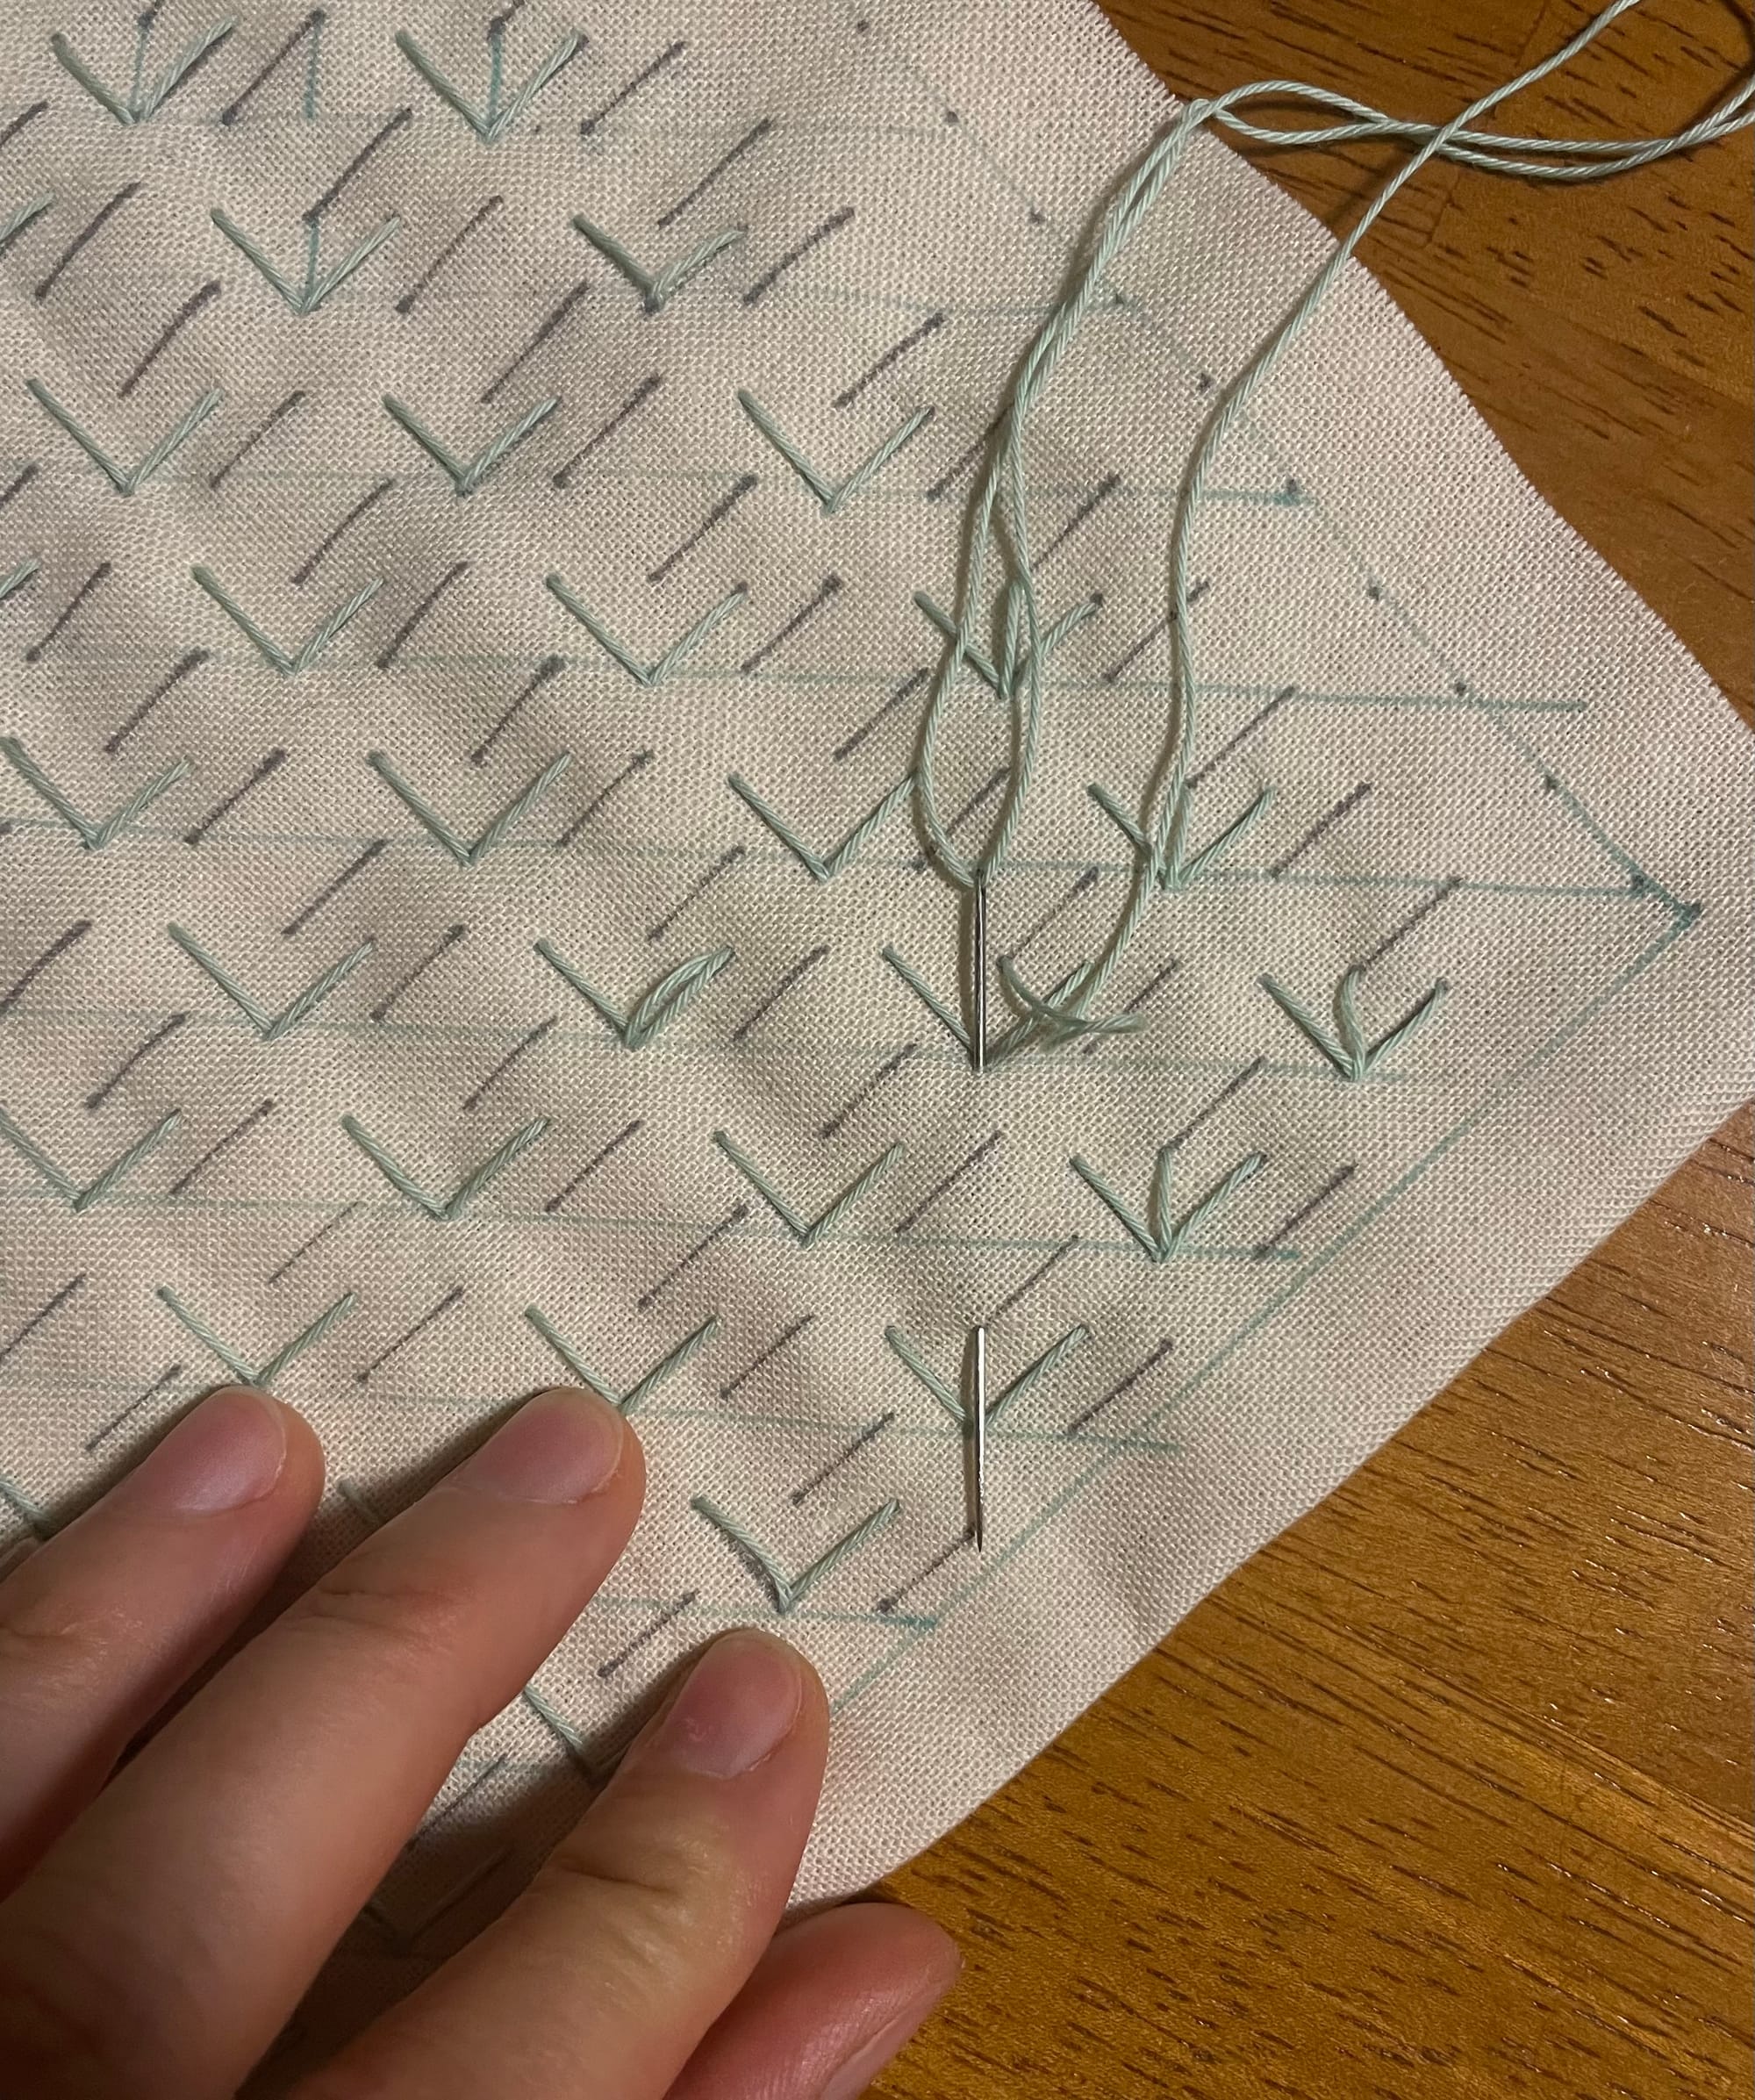
If you want to keep the left side neat and you are using two layers, hand the thread over to the next stitch between the two layers.
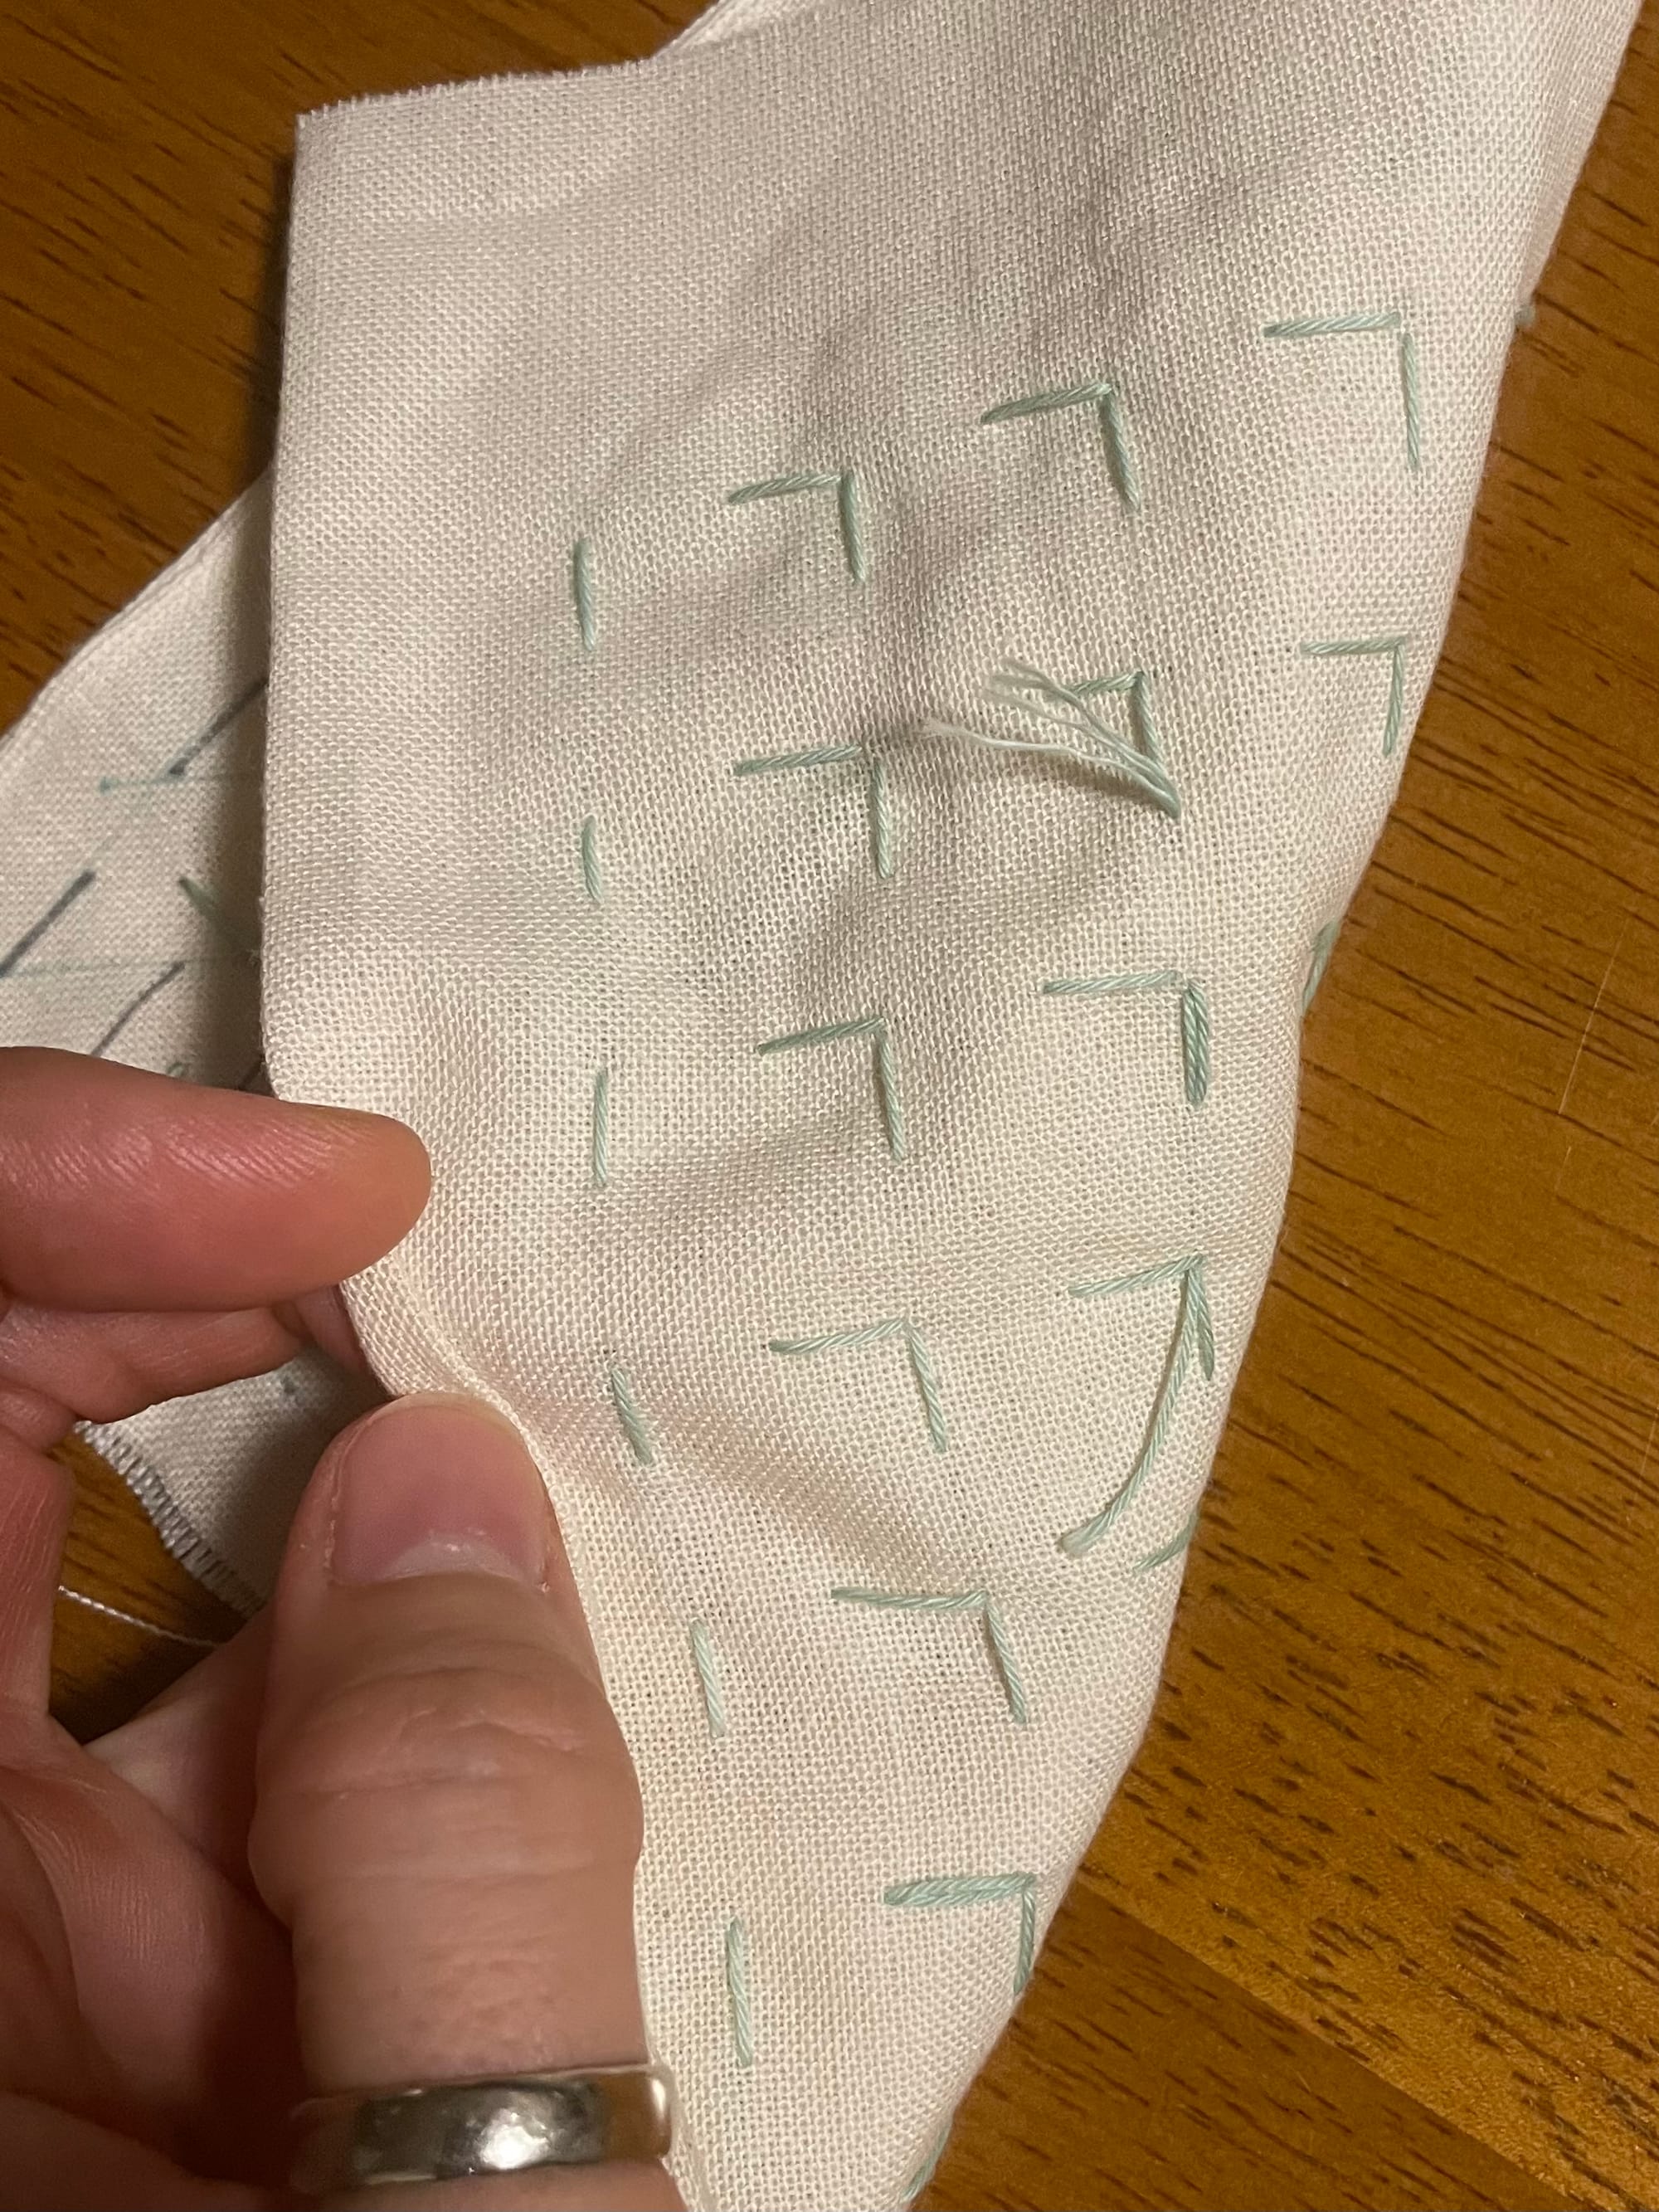
That gets you to this point:
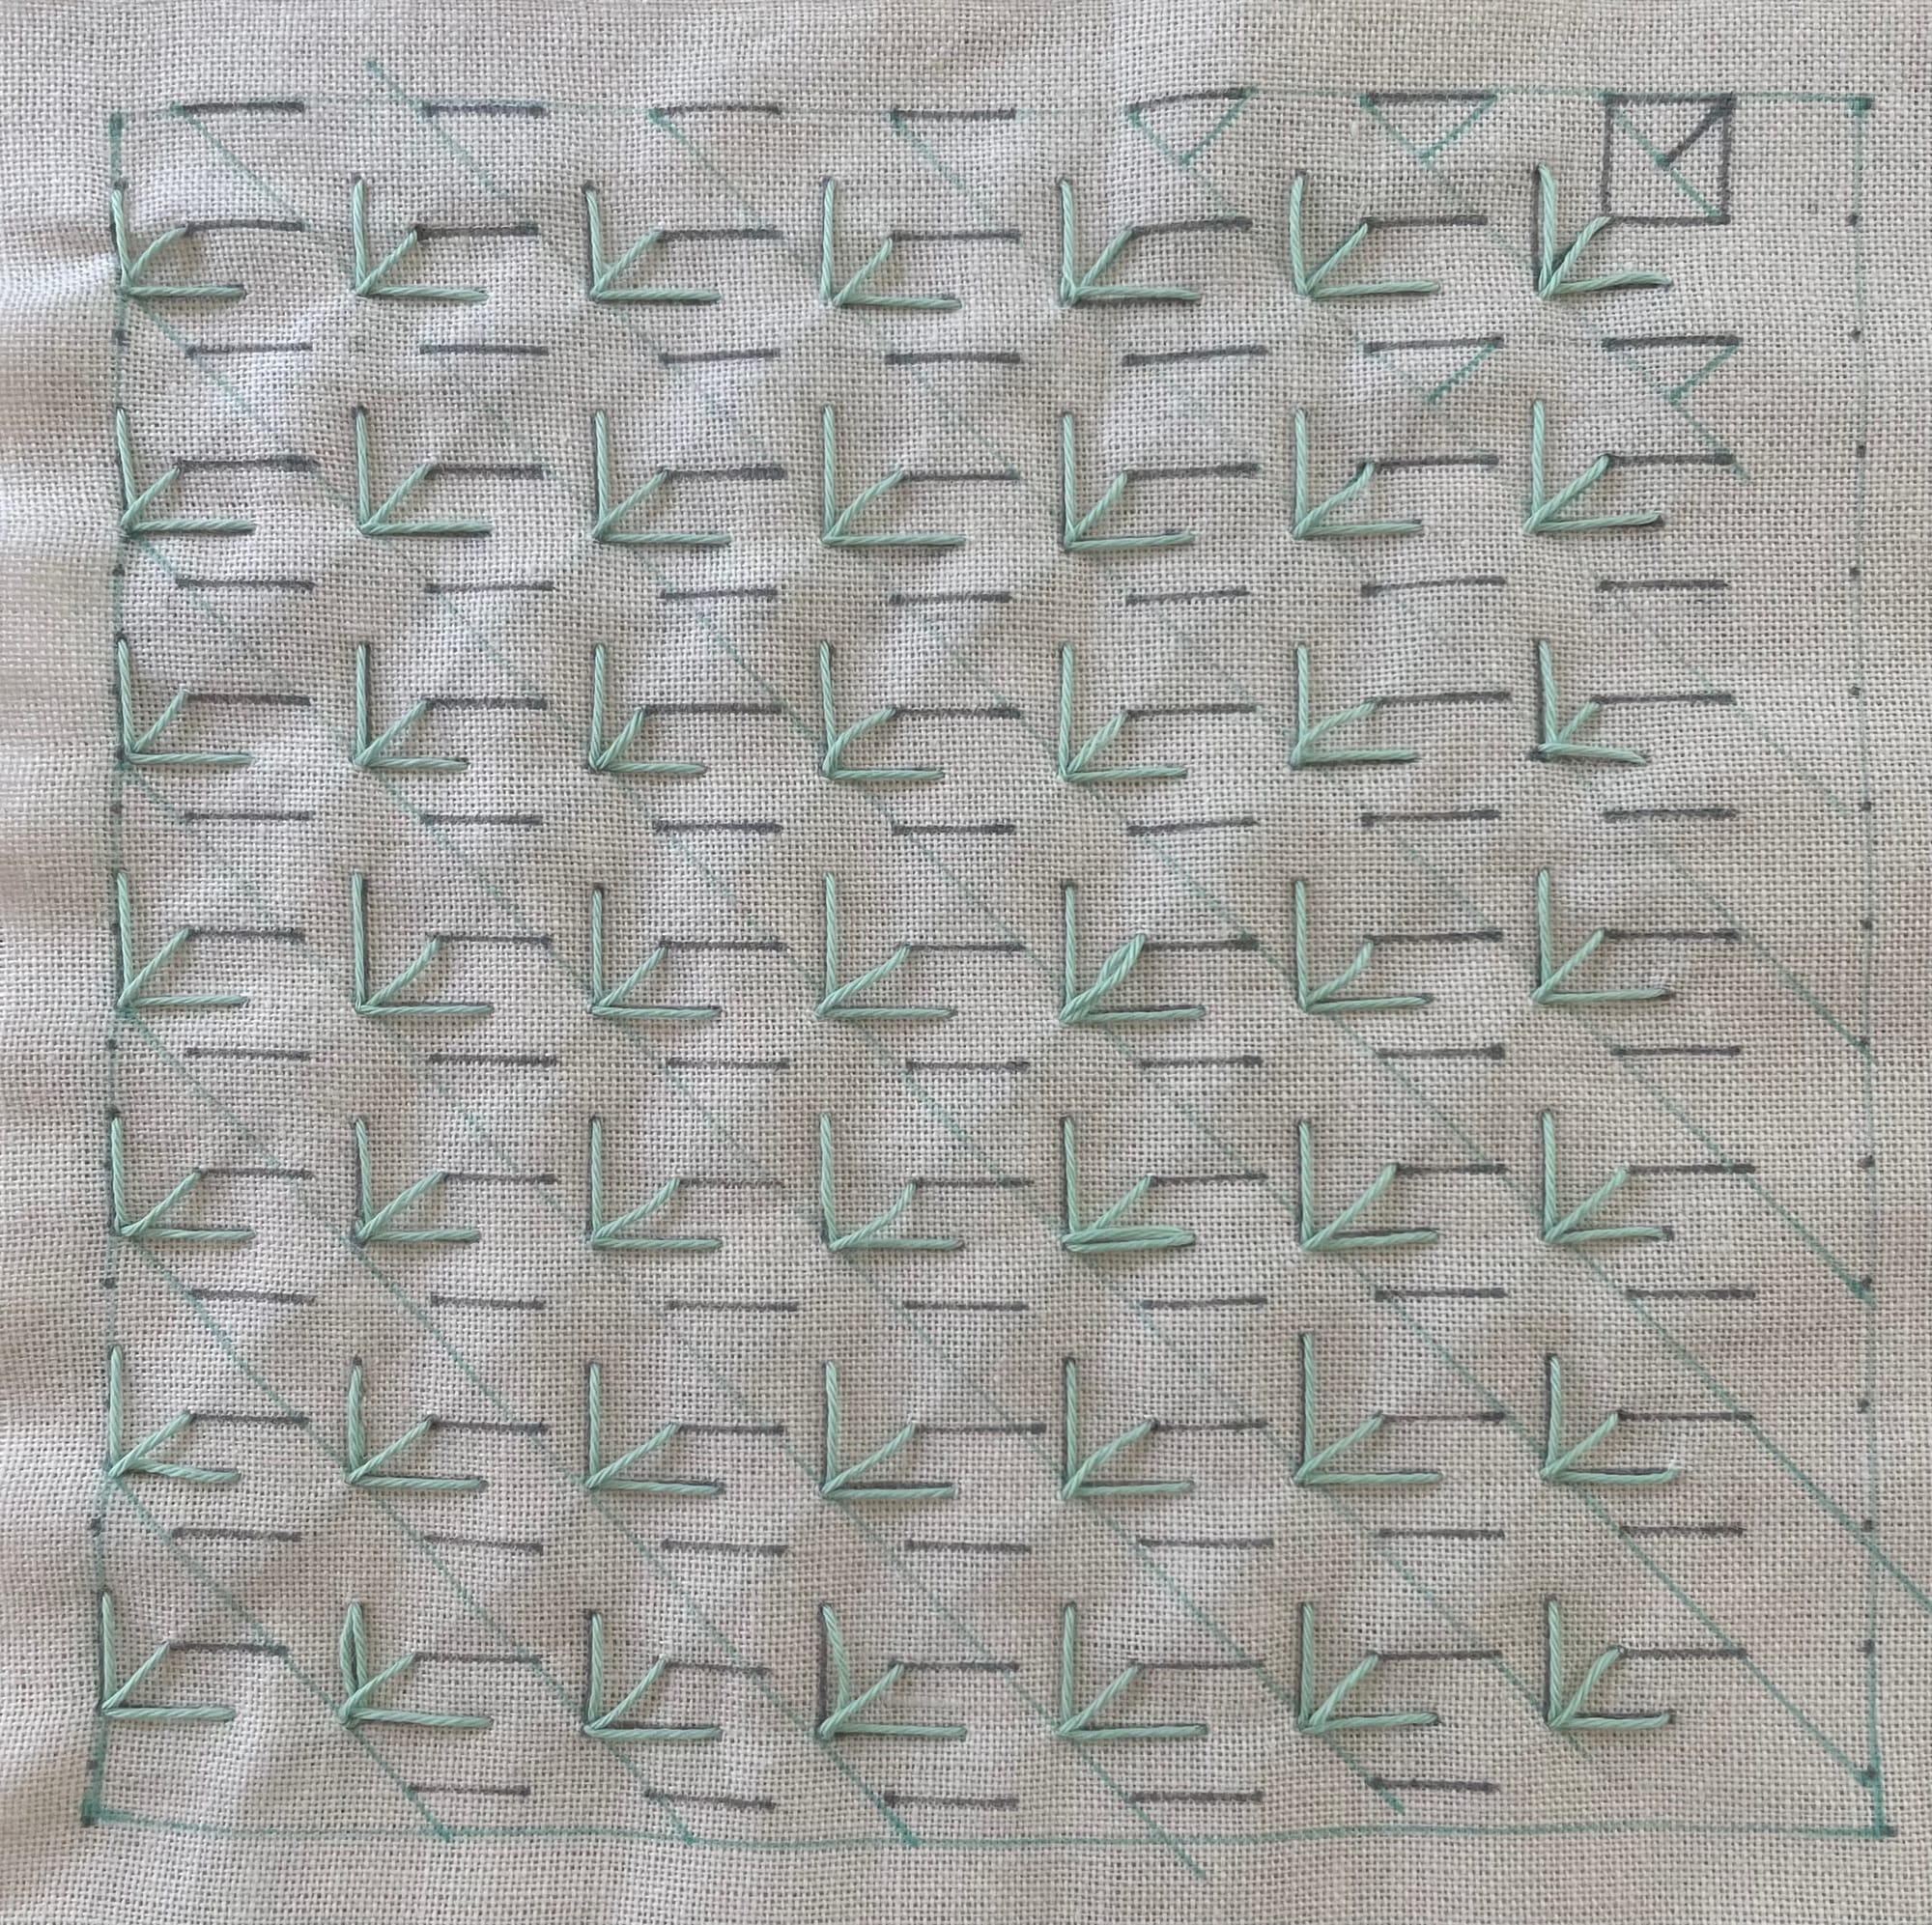
Step 10 – Sew one direction of the petals
In this step, fill in the horizontal or vertical stitches of the petals.
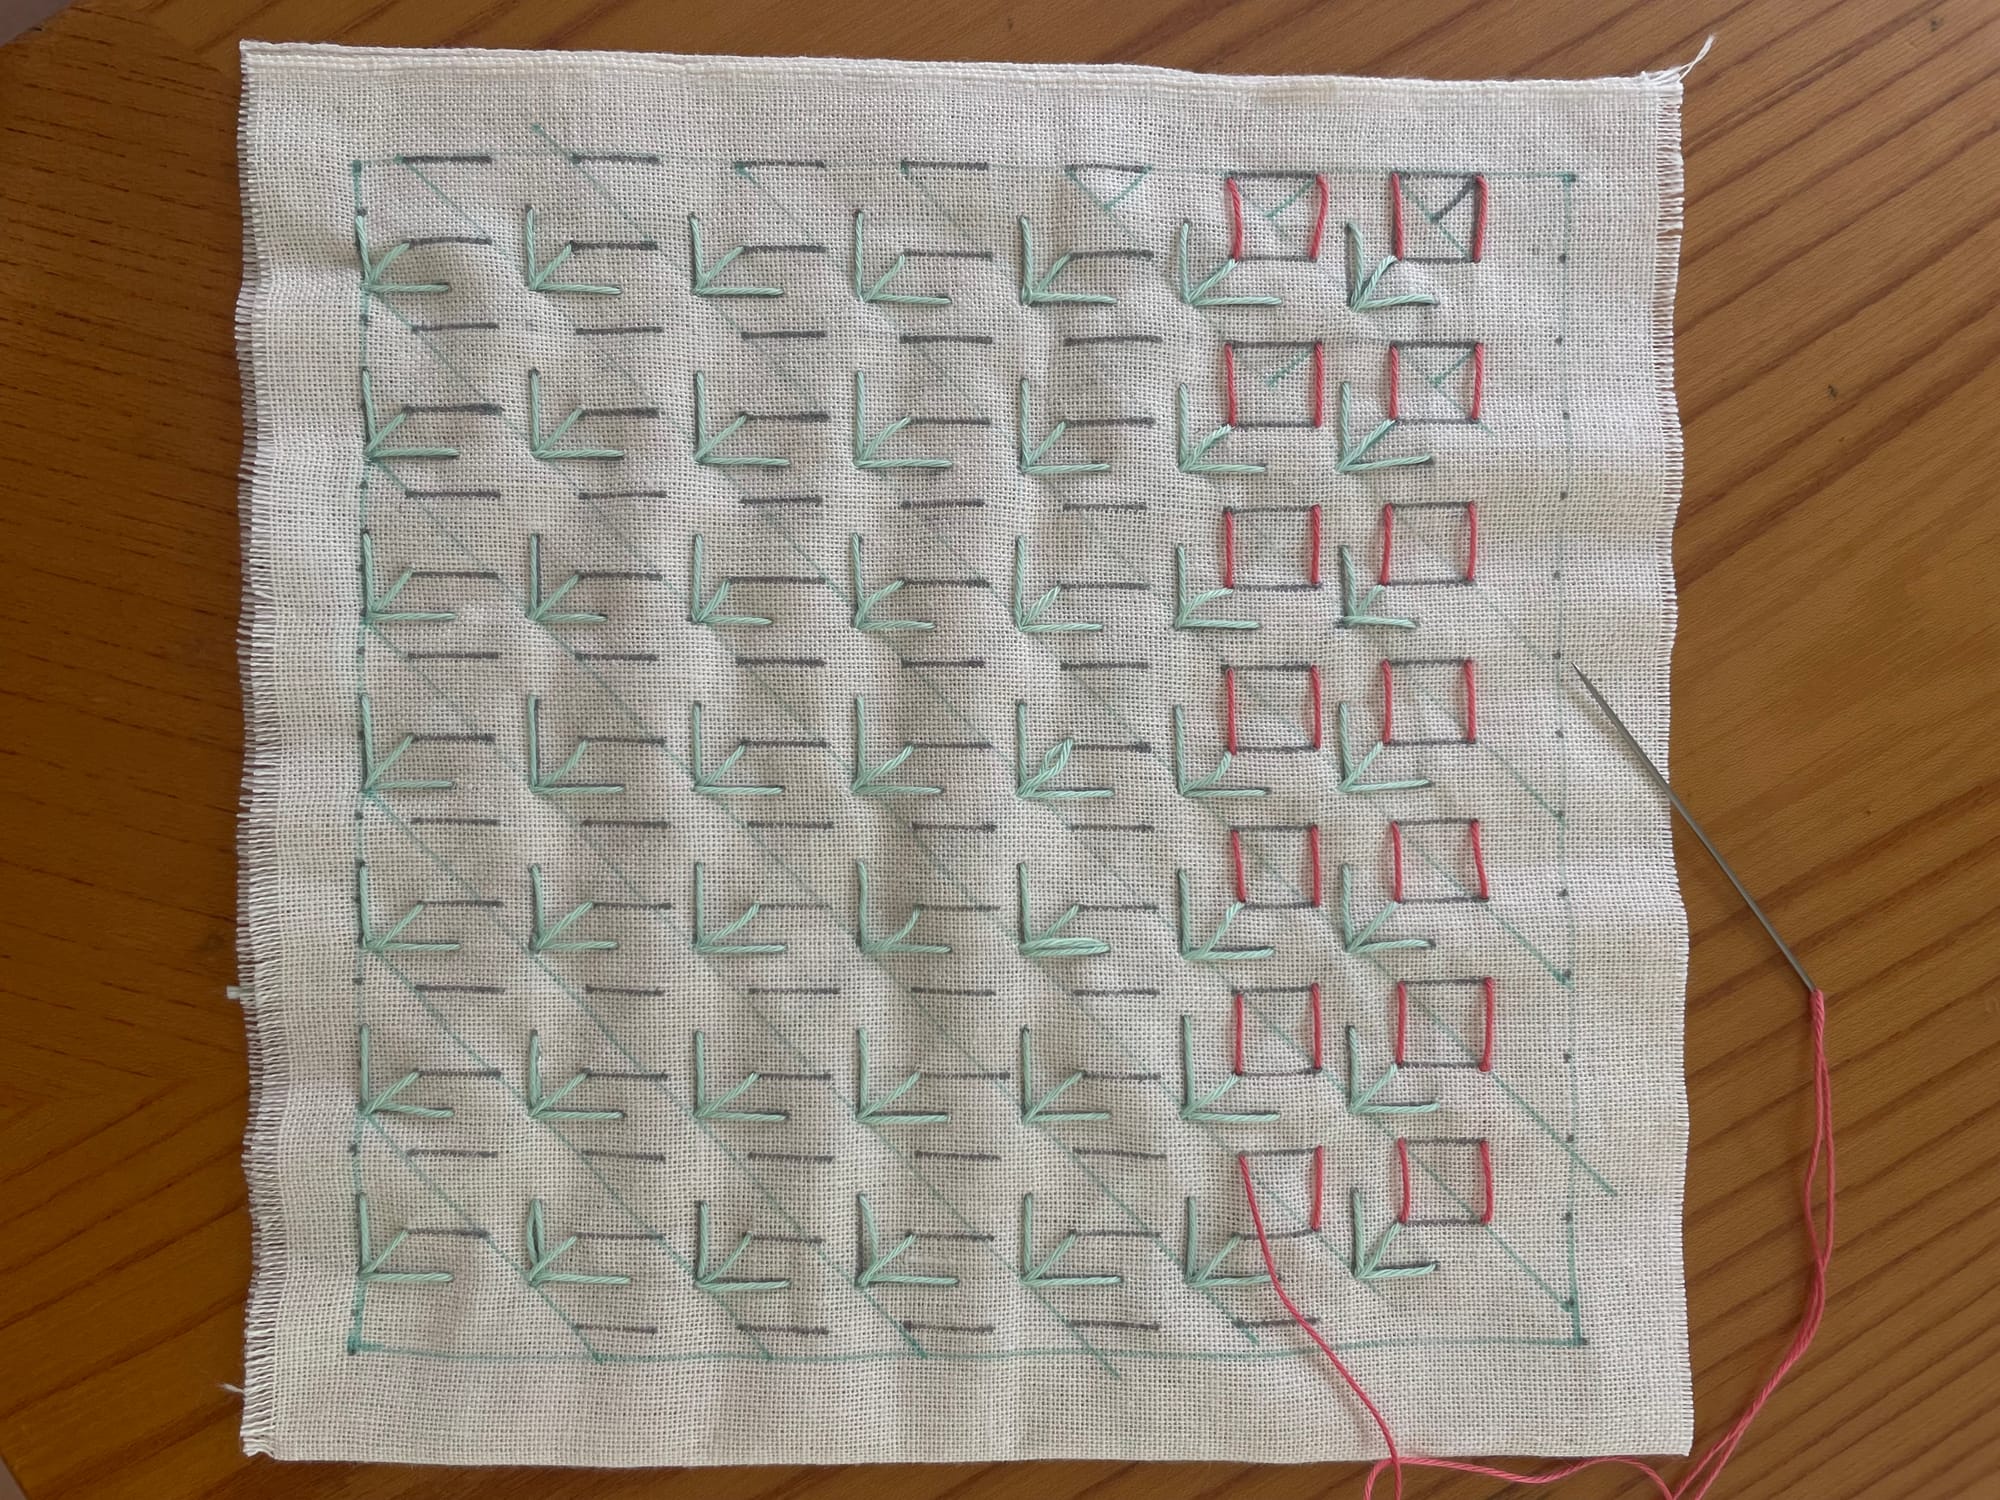
Step 11 – Sew the other direction of the petals
Fill in the other direction next.

Step 12 – Fill in the tip of the tulip
Fill in the diagonal petal stitches next. Here, too, I recommend you hand over the thread in between the two layers.
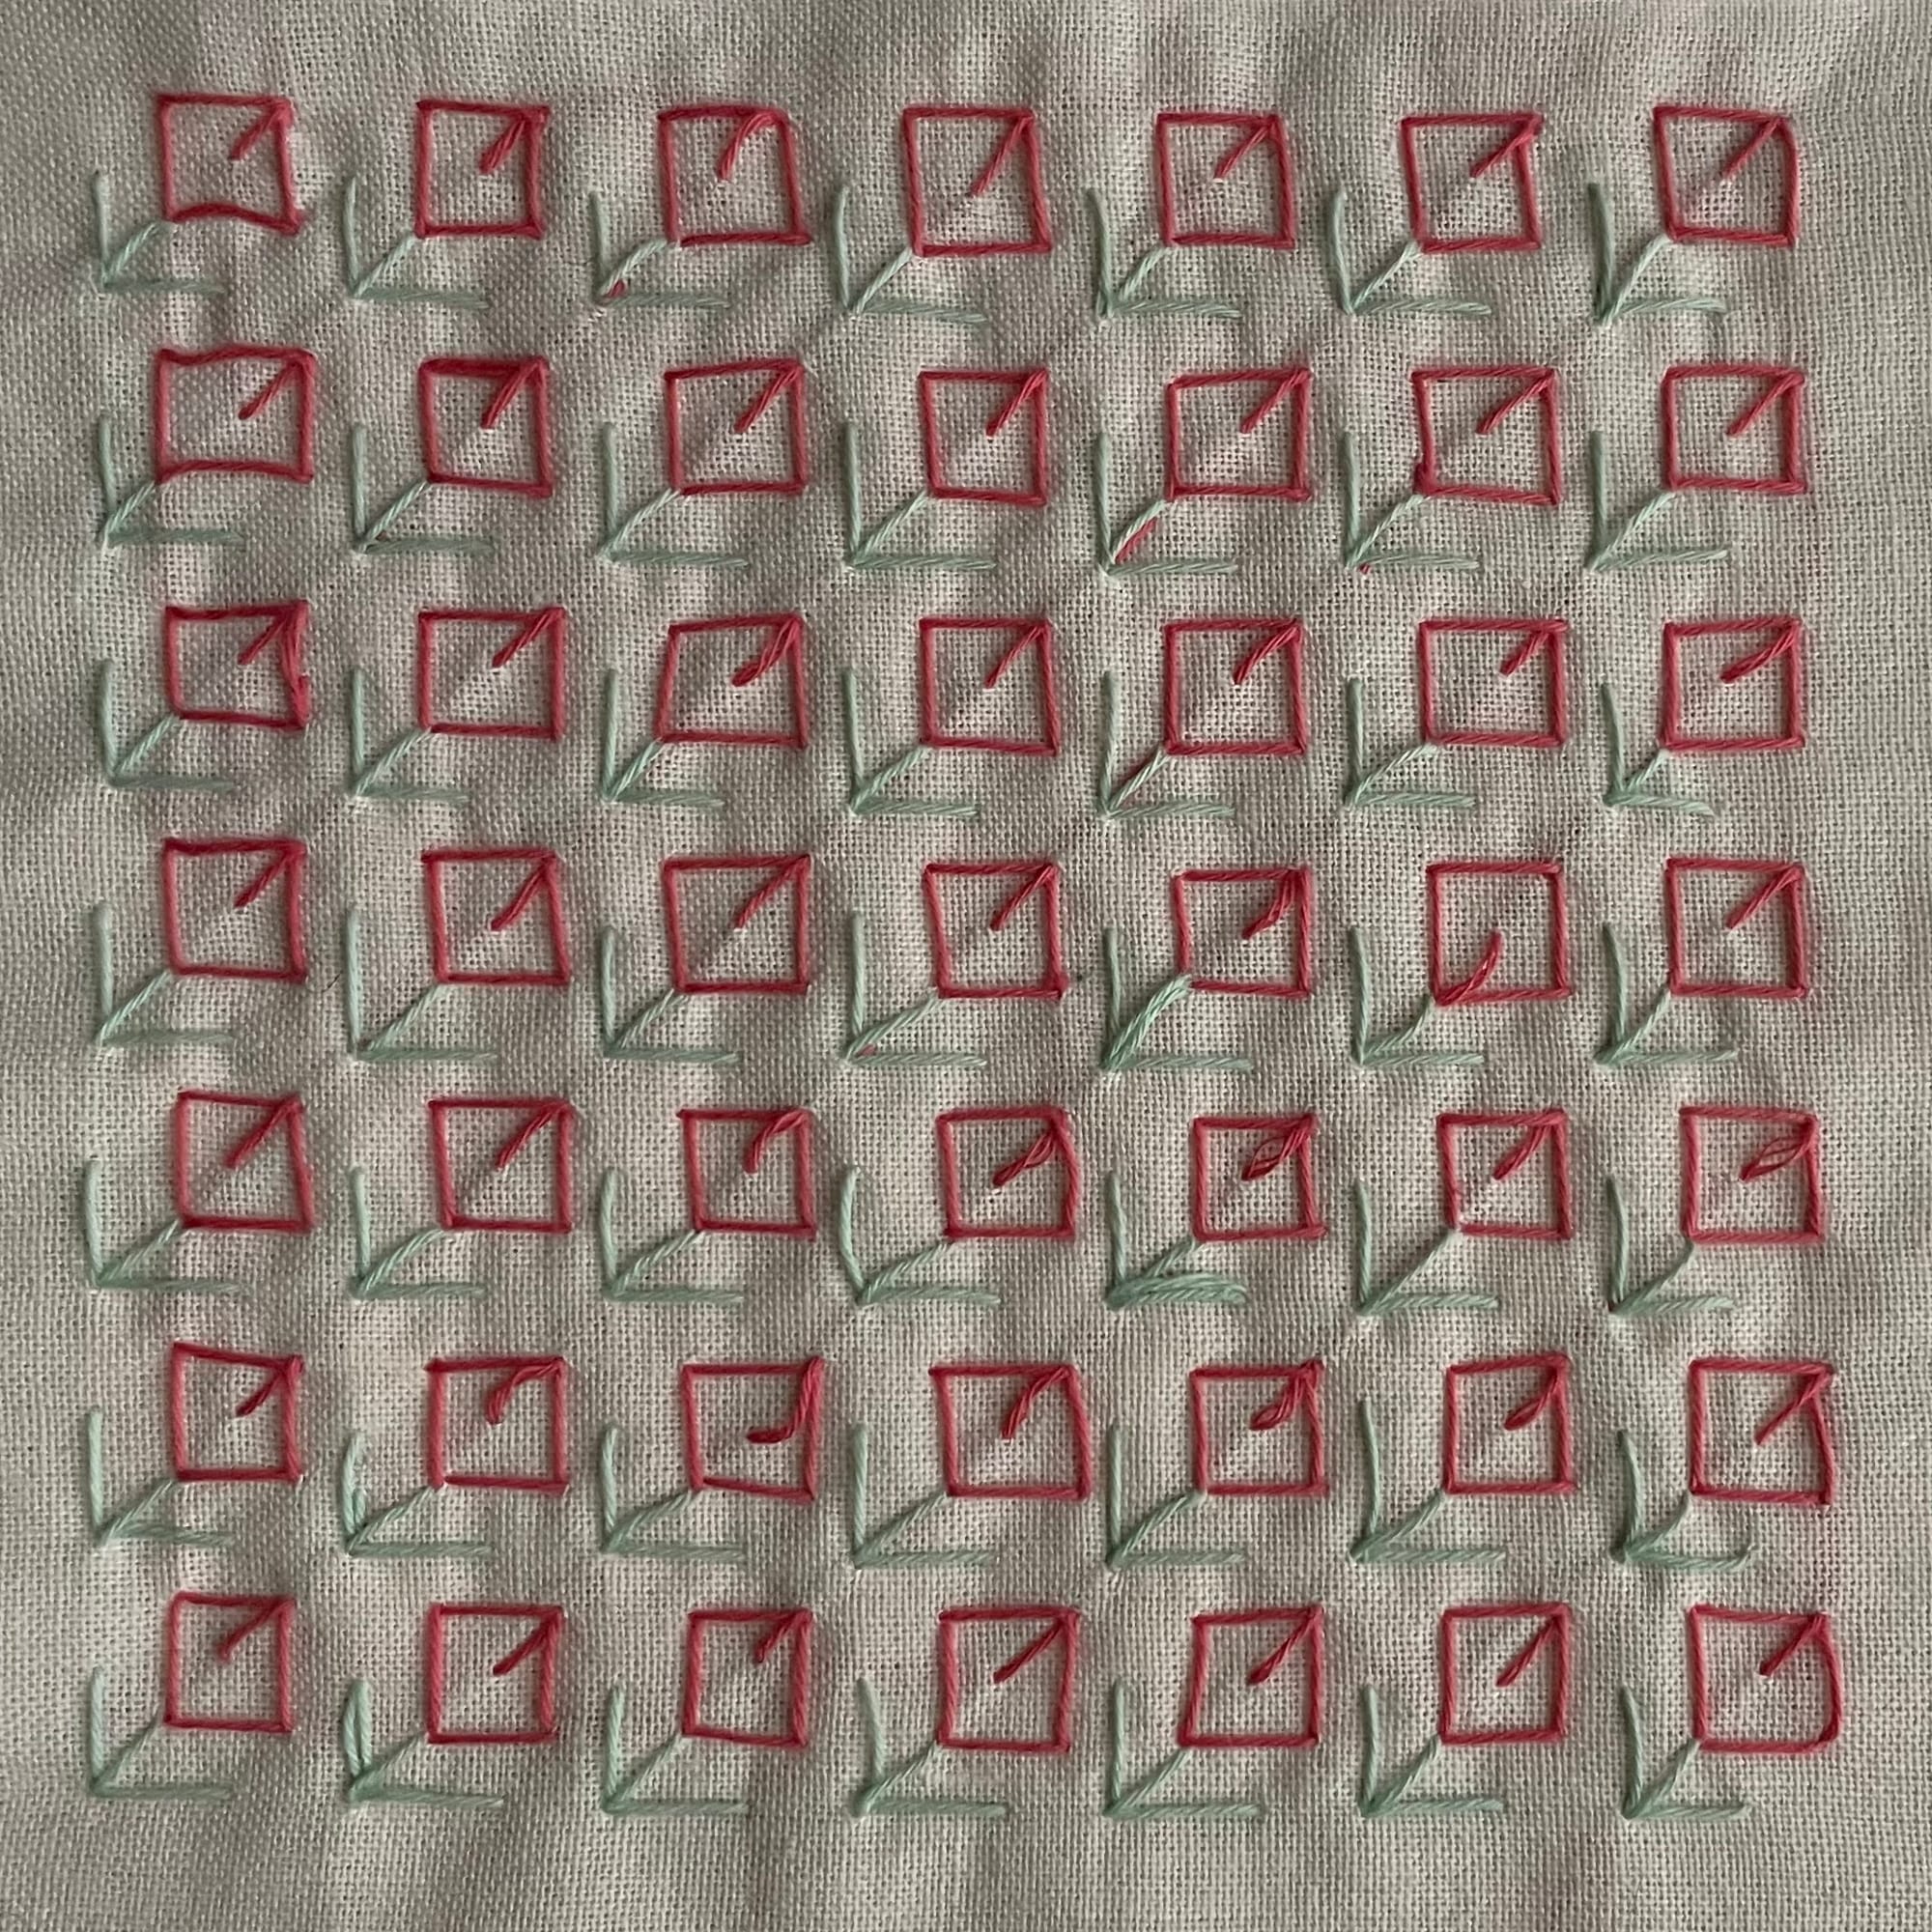
You finished the Tulip pattern! Hooray!!
If you stitch this pattern, I'd be thrilled if I could see and maybe share your result. Tag me with #stitchesontherun or send me an email: janette@stitchesontherun.com!
One tulip on my pattern is different. Have you noticed?
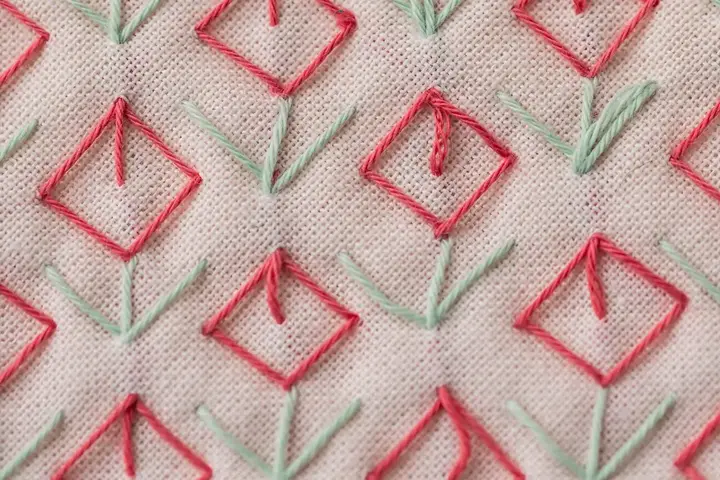
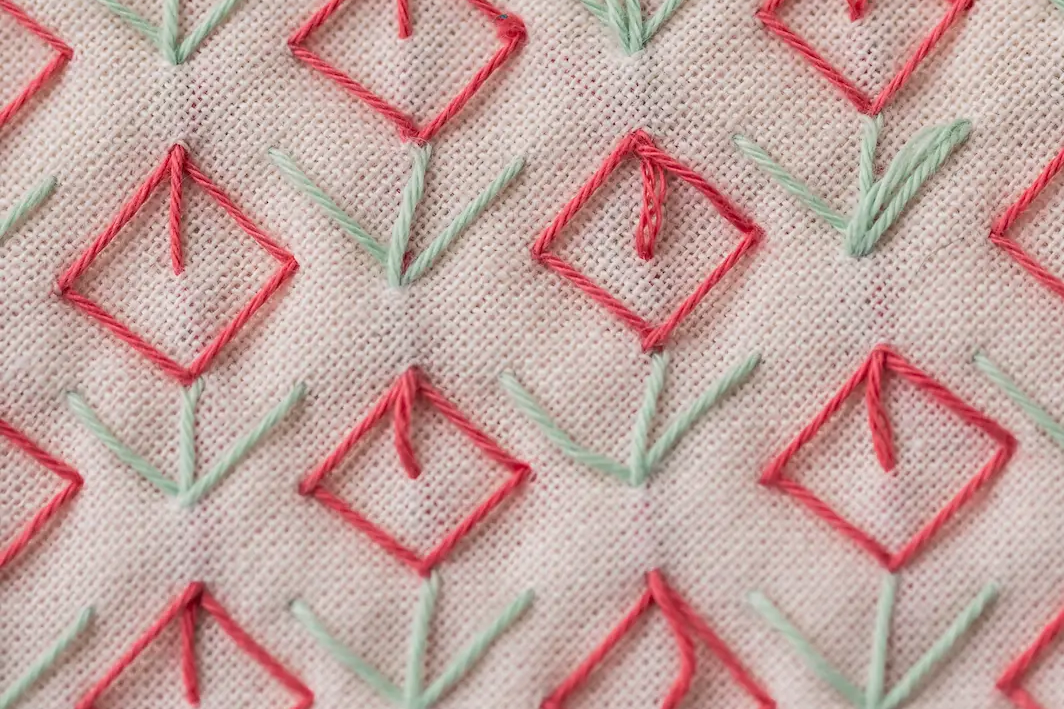
Download the Tulip Sashiko Pattern:



Comments ()